The recent release of Veeam 13.1 introduced a huge number of enhancements to its agent-based protection capabilities. With so many new additions, it’s hard to pick a favourite, but one feature immediately caught my eye: Remote Bare Metal Recovery.
Bare Metal Recovery (BMR) is a term most backup admins are familiar with, although it’s often associated with late nights, pots of coffee and an elevated heart rate. Despite the trauma BMR may have put us through, it’s also saved the day more times than we’d like to admit!
Though less prevalent today, BMR still has its part to play with many organisations relying on physical hardware for both business systems and end user devices. So where does Remote BMR fit into all this?
A typical BMR process starts by booting into Veeam’s Recovery Environment, which can be managed remotely when out-of-band management is available. But what happens when you’re stuck relying on a physical screen and keyboard at a remote branch with no onsite IT staff?
Traditionally, your options were limited to guiding a non-technical user through the recovery process over the phone or sending an engineer onsite. Neither option is ideal, and both can lead to prolonged downtime.
This is where Remote BMR comes in, giving backup admins full control over the recovery process while requiring little to no hands-on involvement from the end user.
Let’s jump into the lab and put this to the test. We’ll run through a couple of scenarios to see how to set up Remote BMR and what the new restore process looks like.
Requirements
Remote Bare Metal Recovery requires Veeam Backup & Replication 13.1 can only be managed and initiated through the web UI.
The full list of requirements and limitations for Remote BMR are available from the link below.
One of the requirements worth calling out specifically is that Remote BMR is only available with Advanced or Premium licensing.
Lab Setup
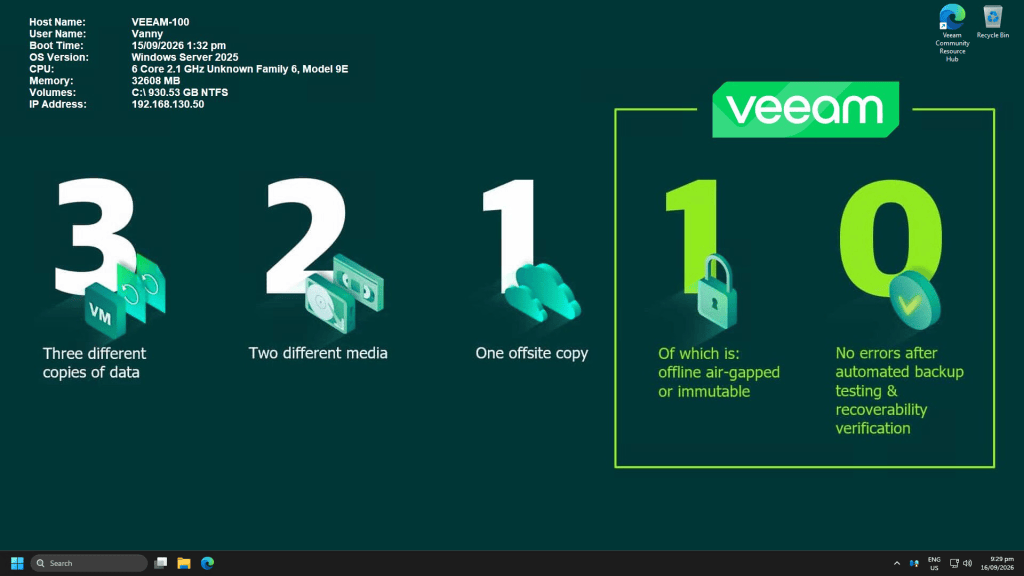
To keep the testing as realistic as possible, I’m using a physical machine in my home lab at act as our “remote site”.
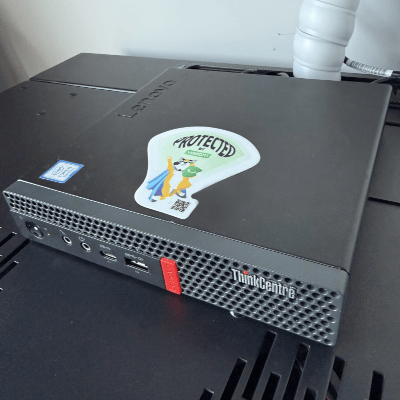
I’ve also checked off some of the tasks to prepare for Remote BMR already:
- Target machine added into a protection group
- Windows agent installed
- Backup job created
- Restore points available
Remote BMR using Recovery Media
For the first scenario, let’s assume the physical machine encounters a critical failure and can no longer boot into Windows.
Let’s start with the Recovery Media. Whenever a new physical workload is being protected, it’s good practice to create the Recovery Media ahead of time. This minimises downtime by allowing you to trigger a Remote BMR as soon as a disaster occurs.
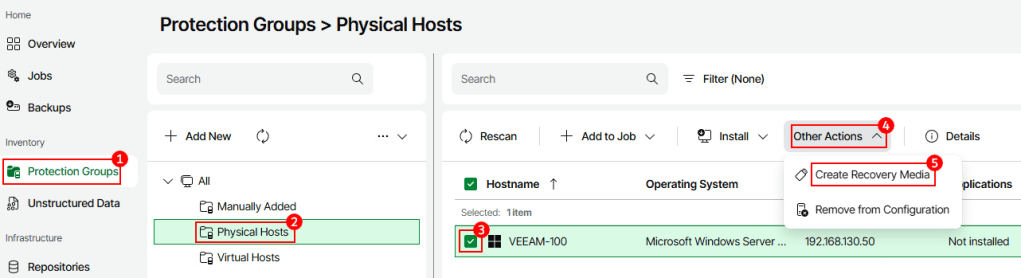
From the web UI open Protection Groups, select your protection group. Now select your machine and under Other Actions choose Create Recovery Media.
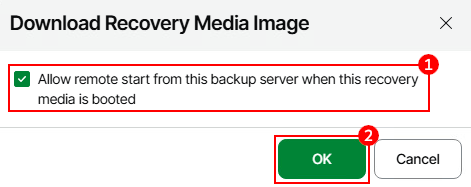
When the popup window appears, ensure that Allow remote start from this backup server when this recovery media is booted is checked and click OK. This enables the Remote BMR capability.
Once the ISO file finishes downloading, it can be transferred to removable media and delivered to the target site so that it is immediately available for use.
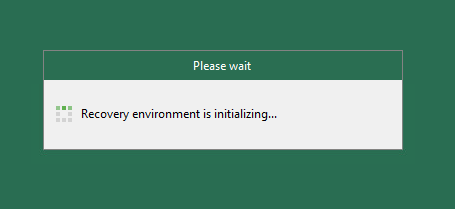
Now let’s move onto the Remote BMR process itself. Once the user inserts the removable media into the target machine and powers it on, the system boots into the Veeam Recovery Environment.
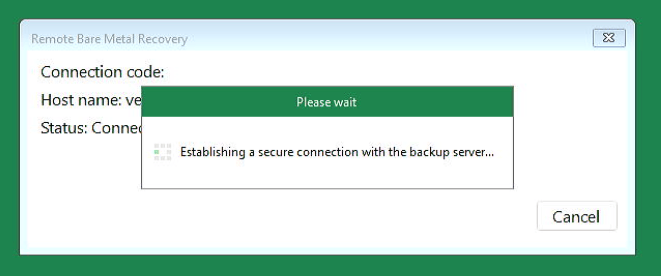
After a few moments Remote BMR starts to establish a connection to the backup server.
Once connected, the recovery environment registers itself as a recovery appliance on the backup server. We can see some details of the recovery appliance below including connection code, hostname name and IP address. The status message will show as Waiting for commands from the remote backup server.
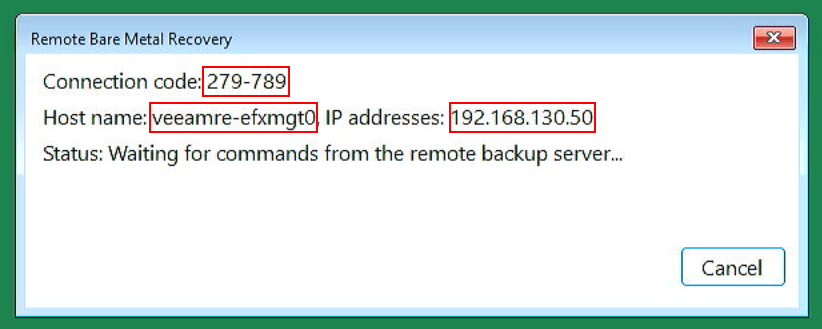
Previously with traditional BMR, the user would be presented with a recovery wizard requiring a series of steps to performed initiate the restore. However with Remote BMR, this is where the end user can step away, passing control over to the backup admin.
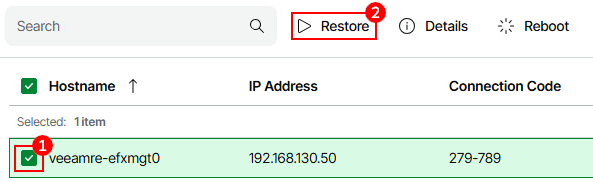
Heading back over to the Veeam web UI, the recovery appliance should now be visible under Protection Groups > Remote Bare Metal Recovery. The same details we just saw in the recovery environment window are also displayed here to ensure you are connected to the right computer.
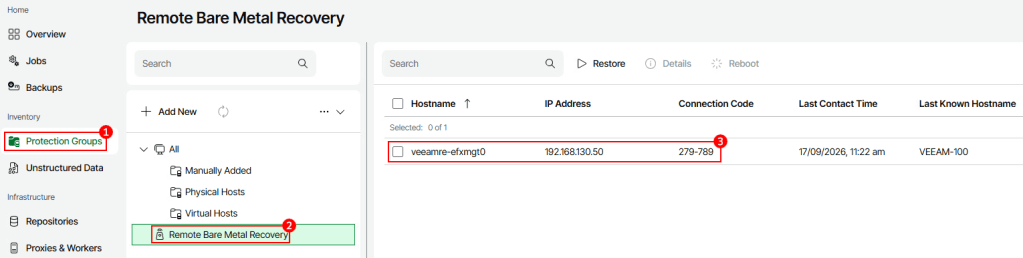
To start the restore process, select the recovery appliance from the list and click Restore.
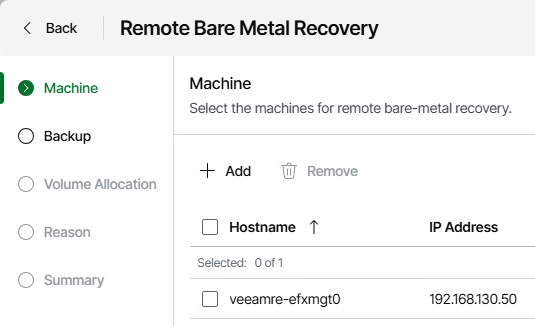
At the first step of the wizard, the recovery appliance selected is added to the list by default.
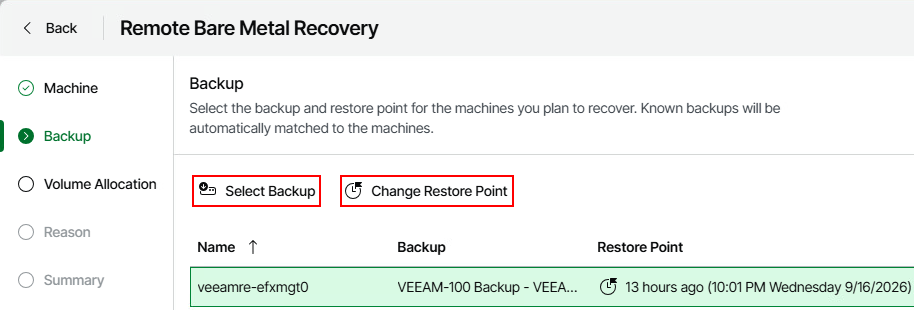
On the next screen, the wizard automatically selects the latest restore point by default, however this can be changed by clicking Change Restore Point. If restore points across multiple backup jobs exist, you can click Select Backup to choose which backup job to select restore points from.
The next step controls how volumes from the backup should be allocated on the machine being recovered to. By default, volumes are restored with the same layout as in the backup, however this can be amended if required by clicking Change Disk Mapping.
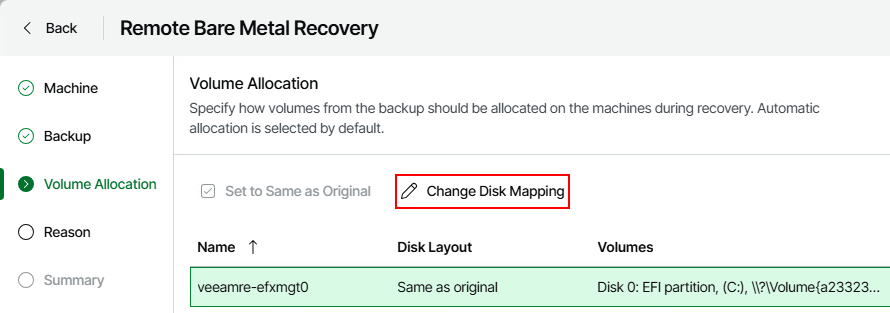
After selecting the Custom allocation (advanced) option and clicking Apply, you are presented with a Disk Mapping window where you can edit the volume layout as needed.
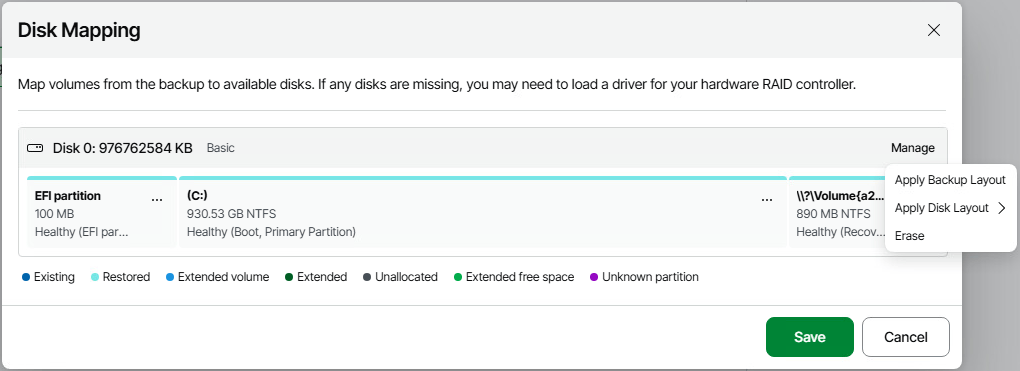
As this is a straightforward restore to the same hardware, I’m going to leave the disk mapping with the default settings.
Next you have the opportunity to enter a restore reason and finally review the summary page before clicking Finish to start the restore.
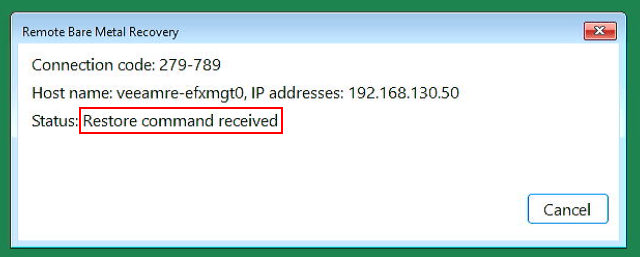
Once the restore begins, the status within the recovery environment will change to Restore command received.
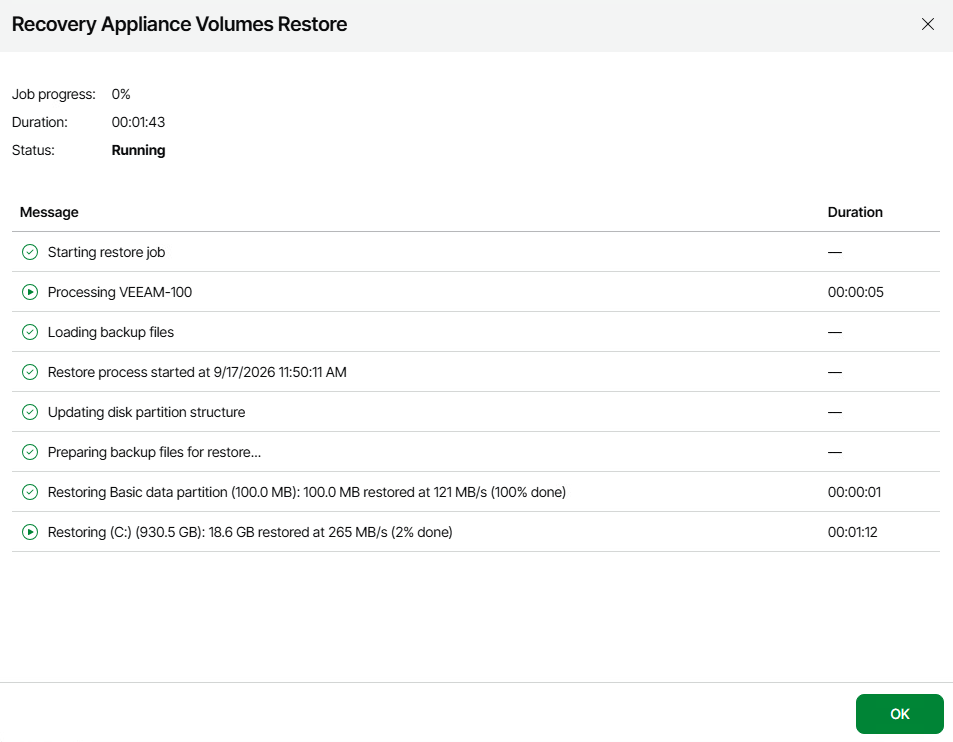
You can monitor the progress of the restore directly from the web UI.
Once the restore is complete, the recovery environment status will change back to Waiting for commands from the remote backup server. You can now go ahead and reboot the recovery appliance directly from the web UI.
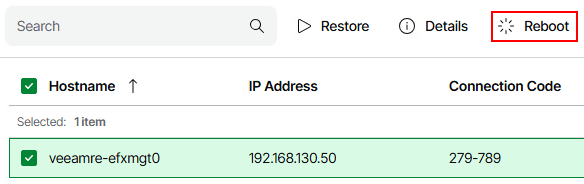
Soon afterwards, the target server will reboot and just like that we’re back in business again!
Remote BMR using Virtual Recovery Partition
Let’s look at another scenario. BMR isn’t only used for system crashes. What if the machine remains functional, but requires a full system rollback to a previous state? While we could handle this using the previous scenario, 13.1 has introduced a much simpler method.
Virtual Recovery Partition is a new feature that stores the recovery environment directly on the target machine. Provided the target machine is online and accessible, no bootable media is required to perform the restore. This enables a simple, streamlined Remote BMR workflow that requires zero physical input from the end user.
While PXE network booting can also achieve a similar outcome, its complex setup requirements make the virtual recovery partition a vastly simpler solution to implement.
The steps required to enable virtual recovery partition are very straightforward.
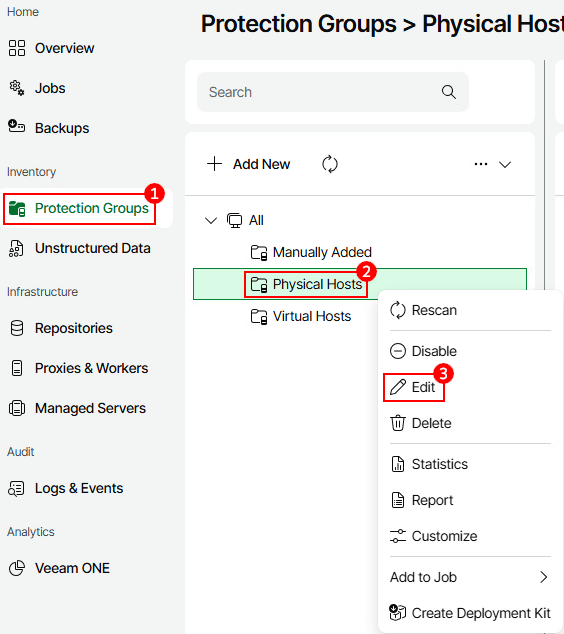
In the web UI under Protection Groups, right click the protection group containing the target machine and select Edit.
Next click on Options then Configure advanced settings.
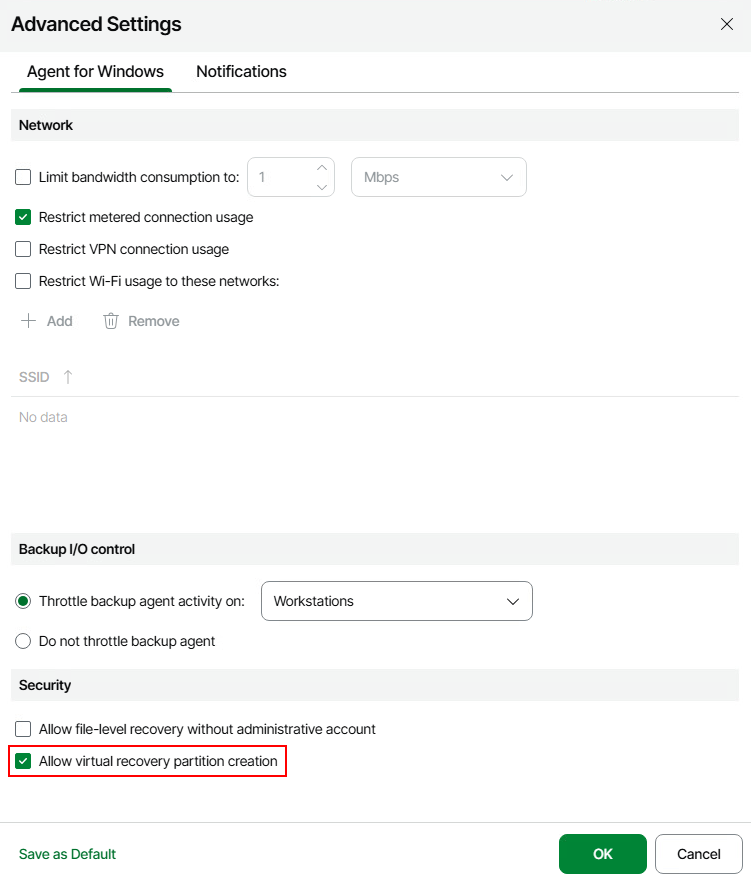
From the Advanced Settings window select Allow virtual recovery partition creation. Click OK then Finish to save the changes.
After the protection group is rescanned, the new setting is sent to Veeam Agent on the next connection. The virtual recovery partition gets stored in a dedicated folder on the system drive and a hidden boot record is added so that the recovery environment can be started on demand.
To initiate a Remote BMR using the virtual recovery partition, simply select the target machine within the associated protection group and click Bare Metal Recovery and then Yes to confirm.
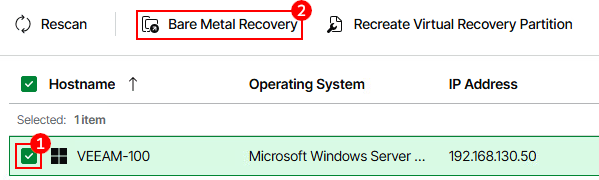
Shortly afterwards, the target machine automatically restarts and boots into the Veeam Recovery Environment.
As soon as the recovery appliance establishes a connection with the backup server, the Remote BMR wizard launches within the web UI. From this point on, the recovery workflow is identical to the previous scenario, driven completely within the webUI by the backup admin.
On a side note, it’s great to see that the virtual recovery partition has been designed to accommodate OS and Veeam Agent upgrades. When an upgrade occurs, the partition is automatically recreated, ensuring the recovery pathway remains ready and available.
Wrap Up
Remote BMR is a great addition, streamlining disaster recovery by giving administrators complete control over the restoration process in the event of a crisis. Shifting management away from end users helps accelerate recovery and keeps downtime to a minimum.
So, while no one likes the idea of receiving that dreaded phone call in the middle of the night, at least Remote BMR can save you from walking someone through a step-by-step recovery while half asleep in your pajamas!
For a full list of new Veeam Agent enhancements introduced in 13.1, check out the link below:
https://helpcenter.veeam.com/docs/vbr/wn/agent_based_protection.html?ver=13
You’ll find some fantastic additions here, including the ability to customise Windows Agent branding including logos, colours and text. Very cool!
That’s all for now – stay tuned for more Veeam 13.1 content coming soon.
 benharmer.blog
Leave a comment