
Whether you’re already a Proxmox user or evaluating a move to the platform, the latest Veeam Backup & Replication update is definitely worth a closer look. Since its introduction in v12, Proxmox support has steadily matured, but v13.1 takes things to a new level with what could be the most significant collection of Proxmox enhancements released so far, including:
- VM Replication
- Instant VM Recovery (experimental support)
- VLAN tagging
- VirtIO driver injection
- Extended Web UI coverage
- Advanced RBAC support (experimental support)
- Improved restore job statistics
The introduction of features such as VM Replication and Instant VM Recovery represents a significant step forward for Proxmox, strengthening its data protection and recovery capabilities as well as narrowing the feature gap with the other supported hypervisor platforms.
Of all the new capabilities, Instant VM Recovery is my top pick. By enabling Proxmox VMs to run directly from the backups of other supported platforms, Veeam has created a powerful migration pathway migration strategy for organisations looking to adopt Proxmox with minimal disruption. There are now a huge number of supported pathways into Proxmox including:
- Backups of Proxmox VE VMs created by Veeam Plug-in for Proxmox VE
- Backups of Nutanix AHV VMs created by Veeam Plug-in for Nutanix AHV
- Backups of oVirt VMs created by Veeam Plug-in for oVirt KVM
- Backups of HPE Morpheus VM Essentials VMs created by Veeam Plug-in for HPE Morpheus VM Essentials
- Backups of Sangfor aSV VMs created by Veeam Plug-in for Sangfor aSV
- Backups of Scale Computing HyperCore VMs created by Veeam Plug-in for Scale Computing HyperCore
- Backups of VMs created by universal hypervisor
- Backups of Xen and XCP-ng VMs created by Veeam Plug-in for Xen
- Backups of VMs residing on universal hypervisors created by Veeam Plug-in for Universal Hypervisor API
- Backups of Microsoft Hyper-V and VMware vSphere VMs created by Veeam Backup & Replication
- Backups of virtual and physical machines created by Veeam Agent for Microsoft Windows and Veeam Agent for Linux
- Backups of VMware Cloud Director VMs created by Veeam Backup & Replication
- Backups of Amazon EC2 instances created by Veeam Plug-in for AWS
- Backups of Microsoft Azure VMs created by Veeam Plug-in for Microsoft Azure
- Backups of Google Cloud VM instances created by Veeam Plug-in for Google Cloud
It’s one thing to talk about new feature sets but what does this look like in the real world? Let’s dive into a practical migration scenario and see how Veeam can help simplify the move to Proxmox.
VMware to Proxmox Migration
Instant VM Recovery for Proxmox is currently marked as Experimental Support in 13.1
In this demo we’ll migrate a VM from VMware into Proxmox VE using the new Proxmox Instant Recovery feature.
Let’s use the web UI to login and take advantage of the new Proxmox enhancements in 13.1. Many of the Proxmox related operations can now be performed directly from here including backup jobs, restore operations, and infrastructure management.
Adding a Proxmox Host
Under Infrastructure > Managed Servers click Add
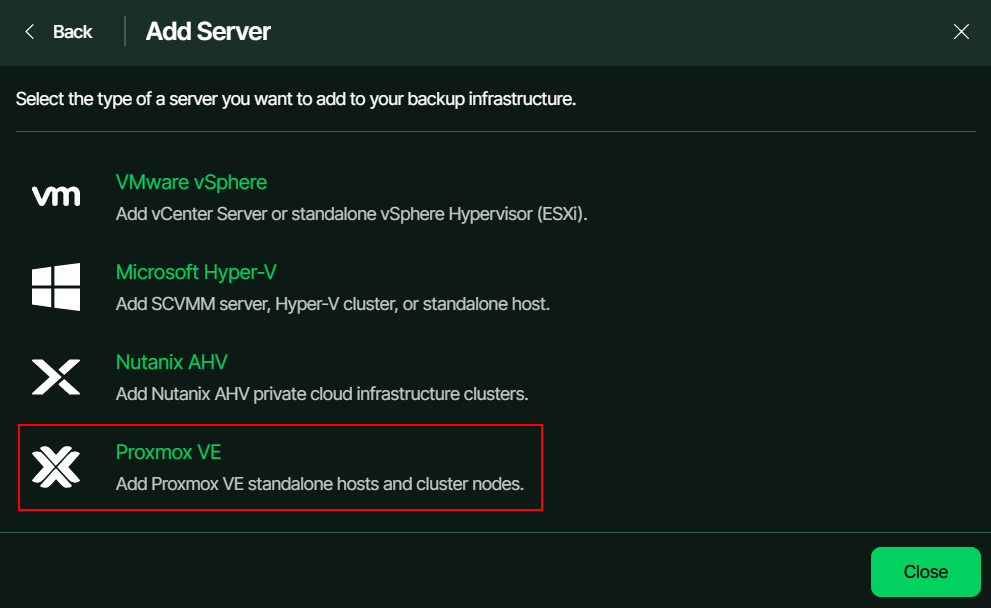
Select Virtualization Platforms and then Proxmox VE from the list.
Next enter the DNS name or IP address of your Proxmox host.
For the Credentials step I created a dedicated Veeam user for accessing Proxmox (recommended for best security practices). Follow the steps in KB4701 to create the account in Proxmox.
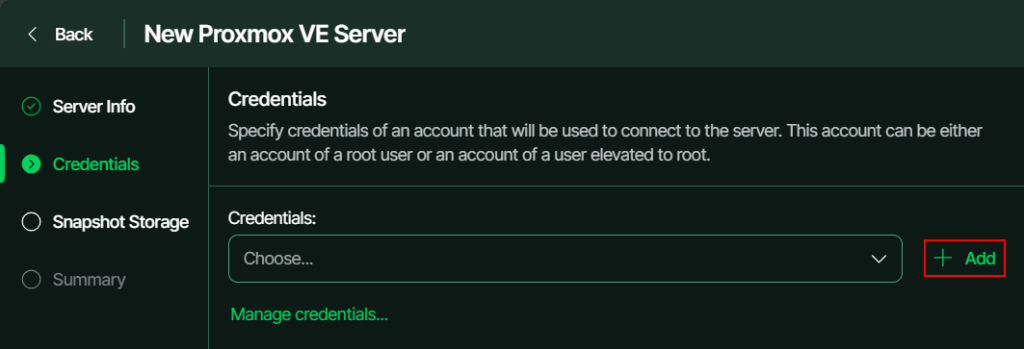
Next Let’s add that account into the Veeam credential manager by clicking Add.
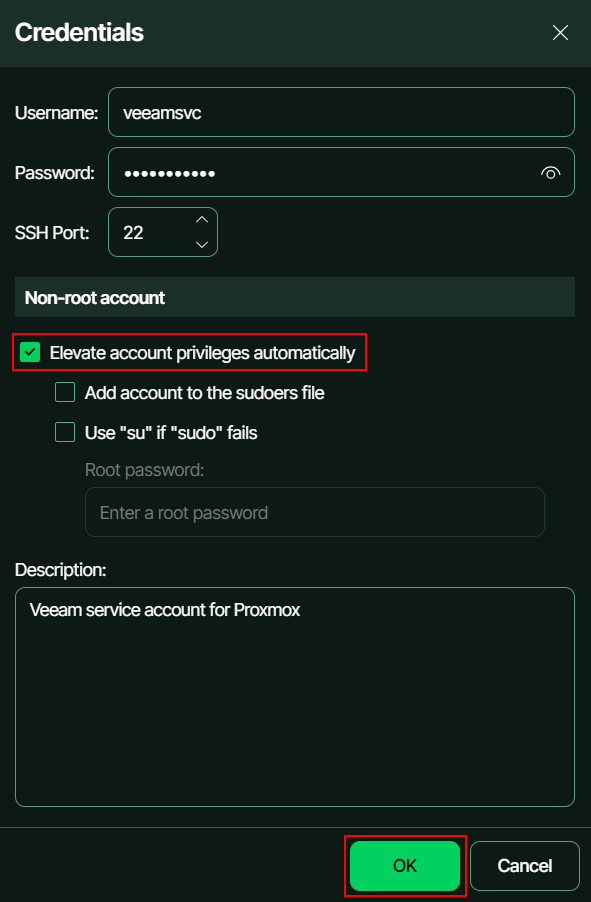
After entering in the credentials, make sure Elevate account privileges automatically has been checked and click OK.
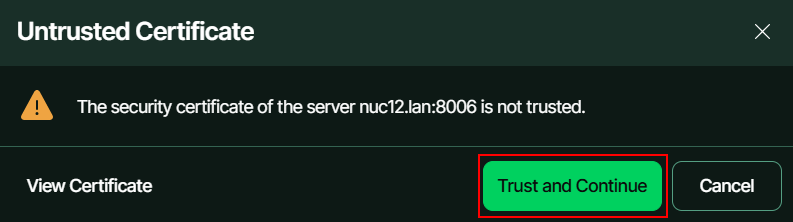
After clicking Next, the below popup appeared since my Proxmox host doesn’t have a valid certificate installed. Since this is in a lab environment I’ll click Trust and Continue.
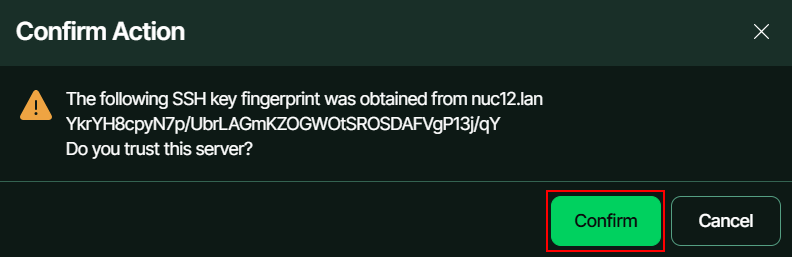
I also had an additional popup appear relating to the SSH key fingerprint which we can click Confirm to trust the server.
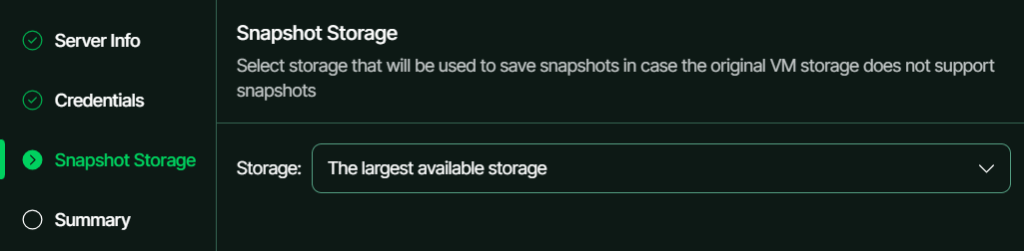
On the Snapshot Storage step I’ll leave the dropdown selection as The largest available storage which is the default, however you can select a particular storage here if you wish.
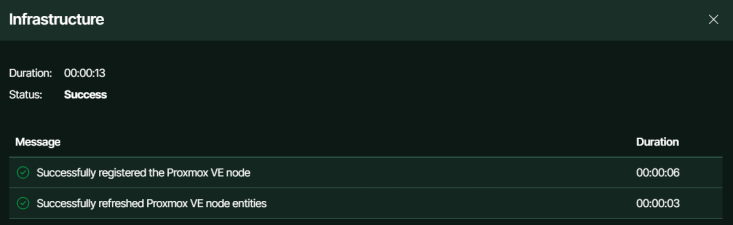
Clicking Next takes us to the Summary page where we can click Finish to begin adding the Proxmox host. Once the operation is complete it should look similar to below.
Performing an Instant Recovery
Now we have the infrastructure in place, let’s walkthrough how to perform an Instant Recovery into Proxmox using a VMware vSphere VM backup as the source. In this walkthrough we’ll look at the steps to migrate both a Linux and Windows OS.
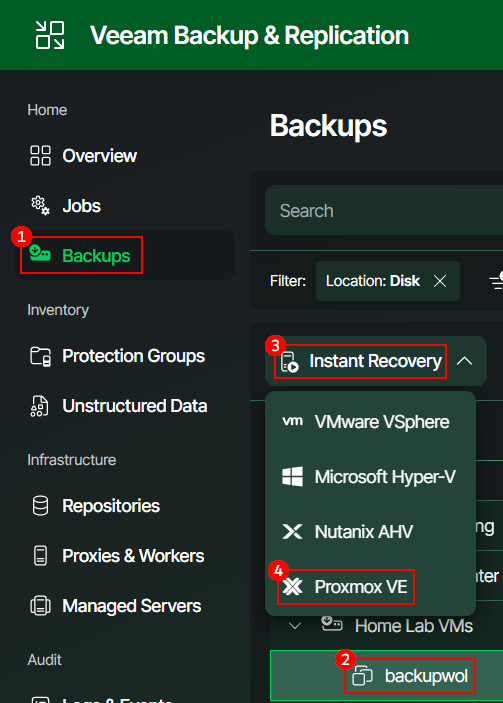
Starting with a Linux VM, under Backups I’ll select one of my lab servers running Debian 12 and choose Instant Recovery > Proxmox VE
Next select which restore point to use – since I’m treating this as a planned migration scenario I’ll use the latest one which is selected by default.
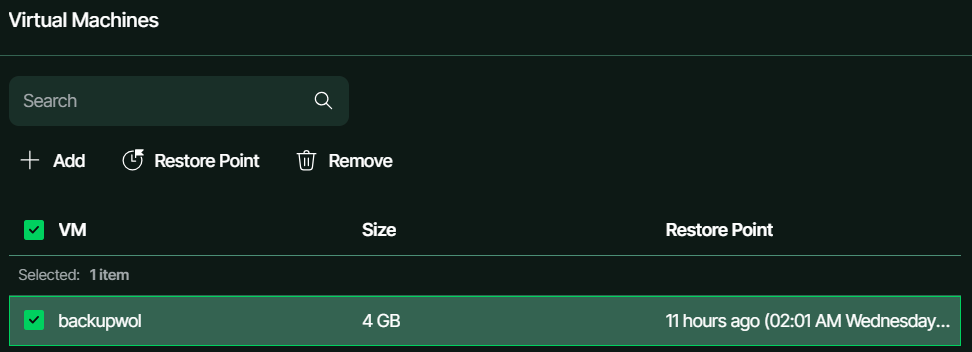
Under the Restore Mode, we only get the option Restore to new location since this is a cross platform restore.

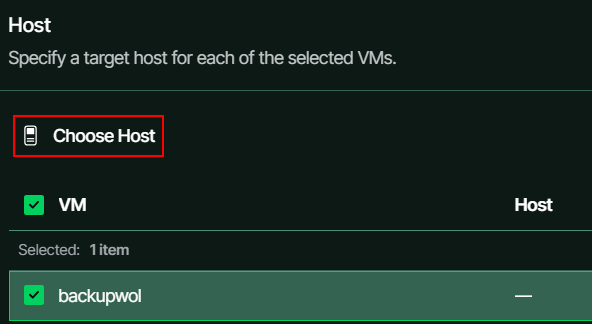
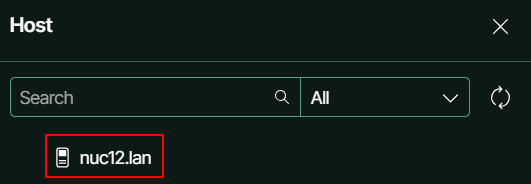
At the Host step, select the VM being restored and click Choose Host. Then in the window to the right select your Proxmox host and click Apply.
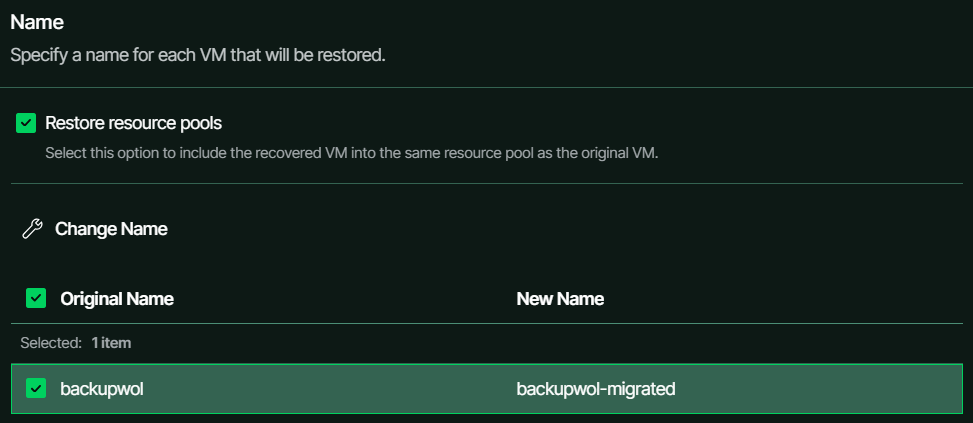
Next decide what the name of your restored VM should be once imported into Proxmox.
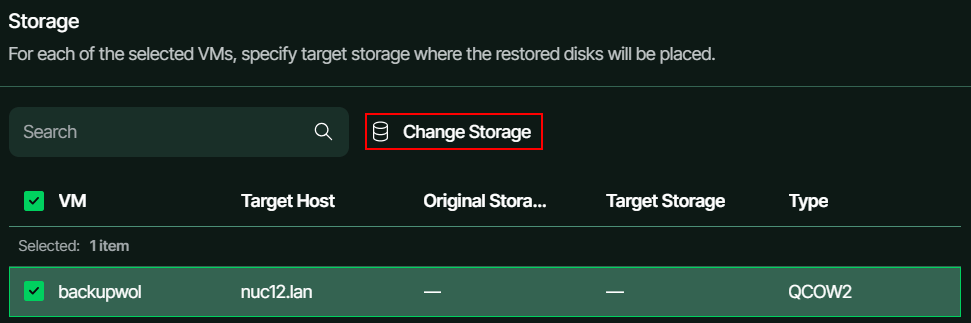
The next step is to configure the storage for your VM which can be done by selecting the VM and selecting Change Storage.
In the window to the right, select your preferred storage from the list and click Apply.
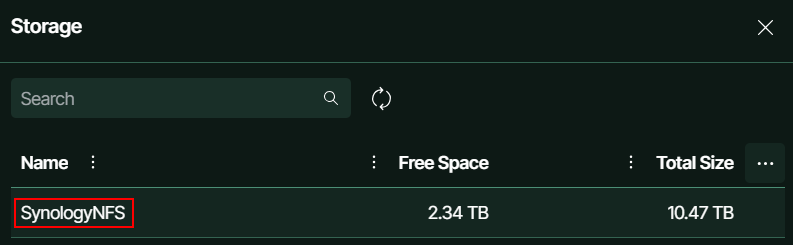
If you find that storage list is empty or your preferred storage is missing, make sure it supports QCOW2. This requirement is mentioned in the User Guide:
“Veeam Plug-in for Proxmox VE does not support Instant Recovery to LVM storage when the Snapshots as Volume Chains (SAVC) mechanism is enabled on the target host. To perform Instant Recovery, use a different storage type that supports QCOW2 format as the restore destination.“
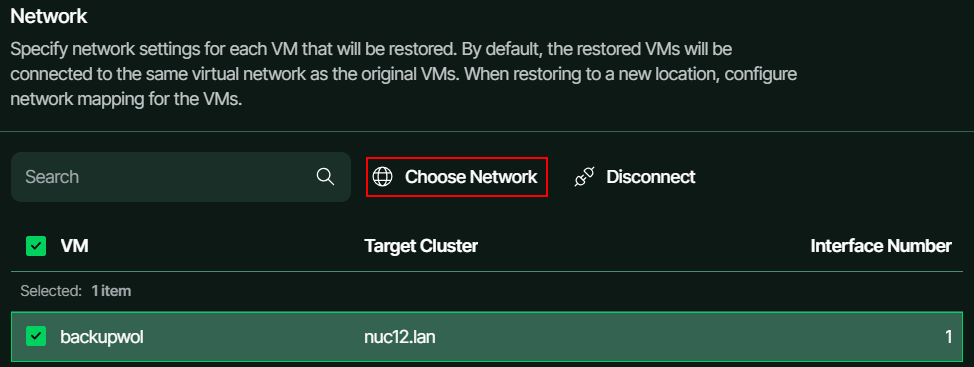
Next up is Networking. I have already preconfigured my VMware networks in Proxmox so now it’s just a case of mapping them. Select the VM and click Choose Network.
In the window to the right select the source network in VMware and select Connect.

Next select Edit and choose the target network in Proxmox that you want the VM to use and click Apply.
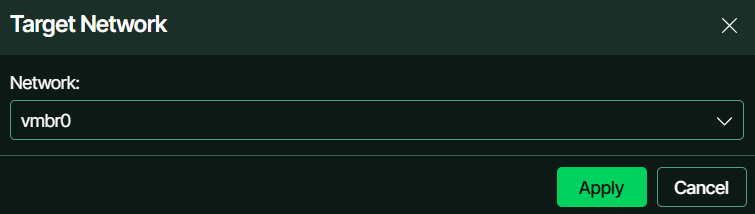
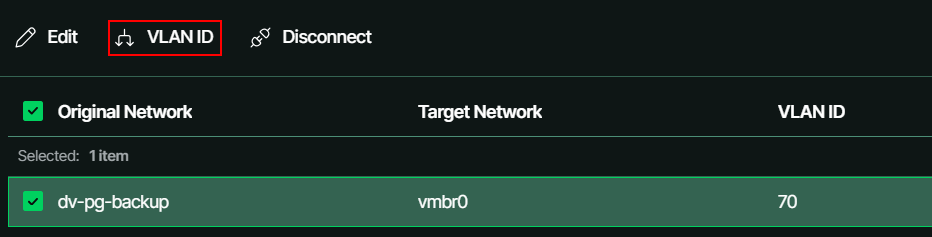
We also have the ability in 13.1 to configure a VLAN for the recovered VM.
In the next step, optionally enter a restore reason then select Power on VMs after restoring on the Summary step before clicking Finish.
After a few moments the job progress screen will appear where you can see the VM was restored and powered on within a minute!
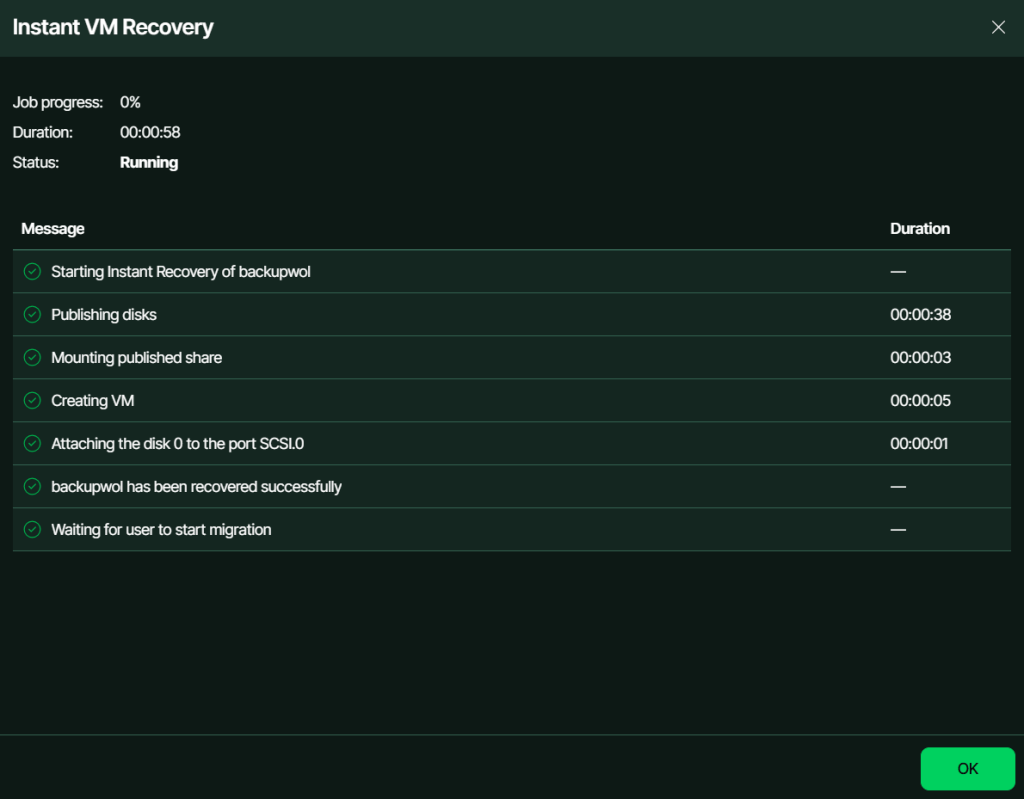
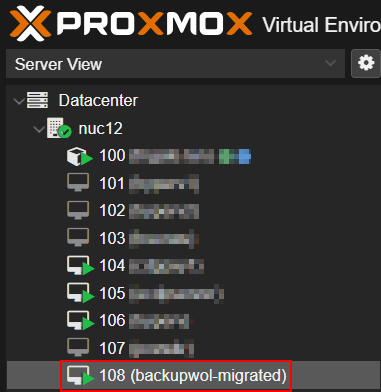
From a usability point of view, the VM booted without any problems – the only manual intervention I had to make was setting an IP address on the new network adapter which is expected with an Instant Recovery to a different hypervisor platform.
Now let’s try an Instant Recovery using a Windows VM. A word of warning though – this one requires a slightly more hands-on approach towards the end of the workflow.
Pre-requisites
Unlike most modern Linux kernels, Windows doesn’t include the VirtIO drivers by default and requires them to be installed for the VM to access the hosts underlying hardware.
The Veeam User Guide even recommends installing the VirtIO drivers on the production system in VMware before performing an Instant Recovery:
“VirtIO drivers must be installed initially before the instant recovery process. You cannot add or modify drives in the VM during Instant Recovery launch.“
Technically speaking this step can be performed after the Instant Recovery is complete however doing it upfront will avoid additional downtime during the migration.
You can find the latest version of the VirtIO Drivers for Windows here:
https://fedorapeople.org/groups/virt/virtio-win/direct-downloads/latest-virtio
Instant Recovery Settings
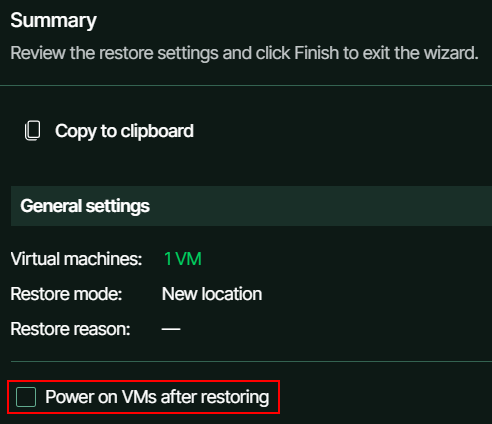
On the Summary page of the Instant Recovery wizard, ensure Power on VMs after restoring is unchecked before clicking Finish. The reason behind this will become clearer in the next step.
Post Recovery
If attempt to power on the VM after the Instant Recovery is complete in its current state, it will fail with an INACCESSIBLE BOOT DEVICE BSOD:
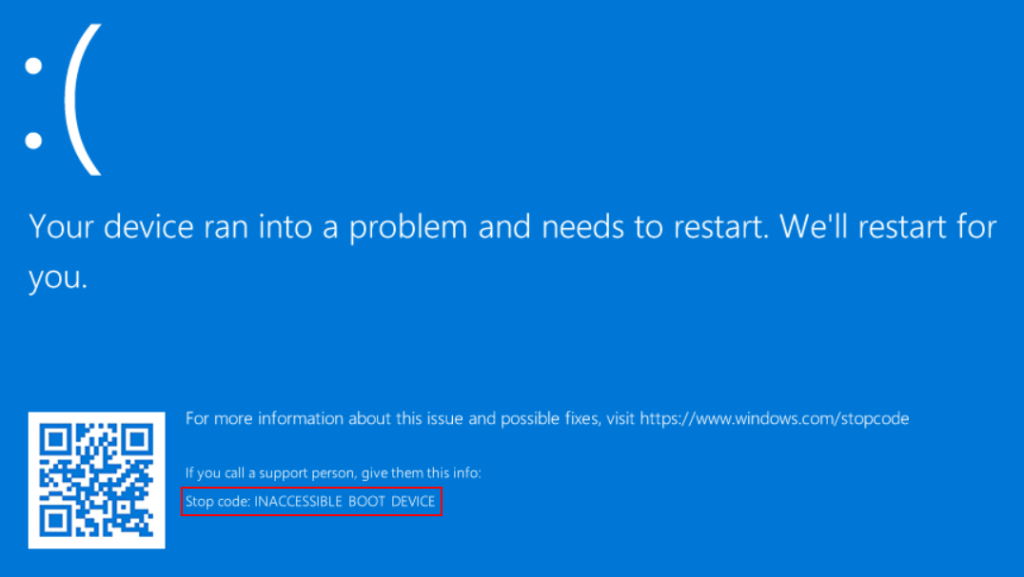
Even though the VirtIO drivers are already installed, Windows is unable to recognise a SCSI disk until the driver has been loaded. Since this only happens after the initial boot process is complete, we find ourselves in a chicken and egg scenario.
Thankfully the Proxmox team have documented a process to workaround this issue:
https://pve.proxmox.com/wiki/Paravirtualized_Block_Drivers_for_Windows#Setup_On_Running_Windows
Unfortunately the process isn’t that straightforward but lets run through the steps nonetheless. Start out by logging into the Proxmox web UI, choosing the recovered VM then selecting Hardware.
Its worth taking a screenshot of the current configuration here before making any changes to refer back to later if needed.
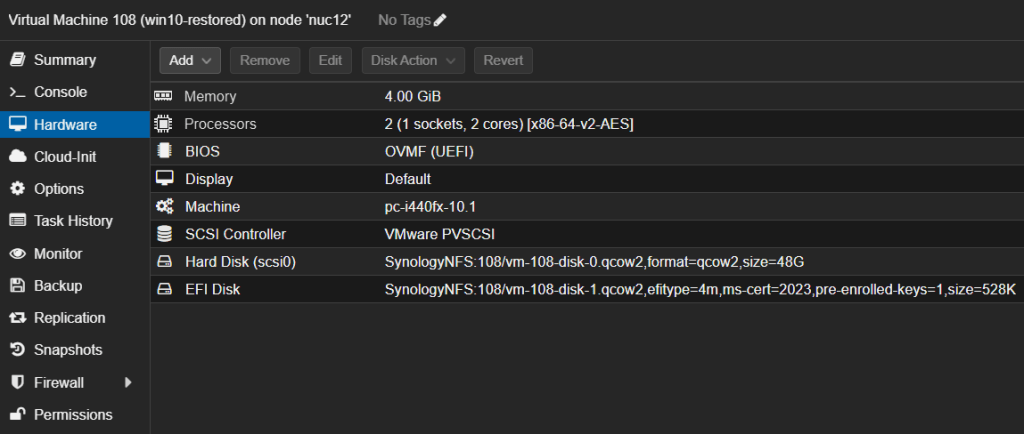
First we are going to change the SCSI Controller for improved performance and optimal throughput. Select SCSI Controller and click Edit.
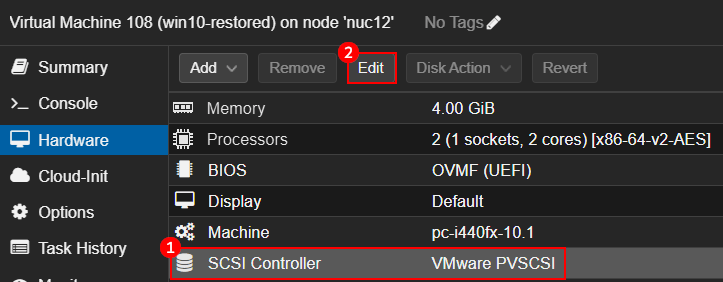
Change the value in the dropdown box from VMware PVSCSI to VirtIO SCSI single and click OK.
Next select the hard disk that contains the operating system and click Detach then Yes to confirm.
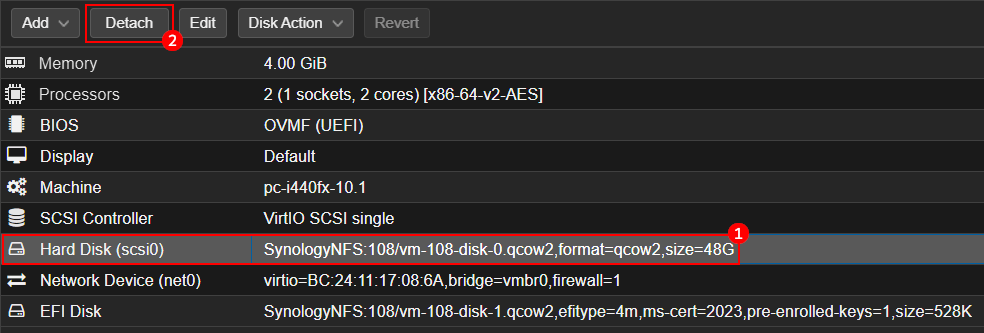
Now re-select the unused disk and click Edit

Change Bus to SATA and ensure the Device value matches what it was initially, then click Add.
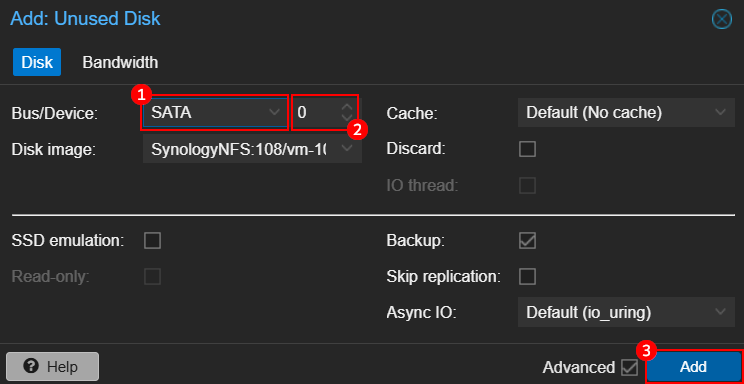
Now you can go ahead and start the VM and it should boot successfully. The VM is currently running from a less efficient SATA bus which we will want to change over to SCSI to make use of the performance benefits it brings.
Do do that, we need to add an additional disk to the VM temporarily, allowing the SCSI drivers to be loaded into Windows which can then be used during the boot process.
From the same Hardware view, click Add > Hard Disk

Change Bus to SCSI, select your preferred storage then set the disk size to 1GB and click Add.

If you like, you can log into the server to confirm the new disk is showing up correctly in Device Manager.

Now we can shutdown the VM and reverse the process:
- Detach then remove the temporary disk we added earlier
- Detach the disk that contains the operating system
- Edit the disk that contains the operating system
- Change the bus to SCSI and ensure the device value matches what it was initially
Now for the moment of truth…
Power the VM back on and it should boot up normally. Other than reconfiguring the IP address, the VM should be fully functional now.
Finalising the migration
Now that we have a working server let’s look at what’s involved in migrating it fully into Proxmox – the steps below are the same no matter the underlying VM OS.
In its current state, the restored VM is running directly from a backup file which is not ideal from a performance perspective. For this reason it is recommended to migrate the VM over to production storage at your earliest convenience.
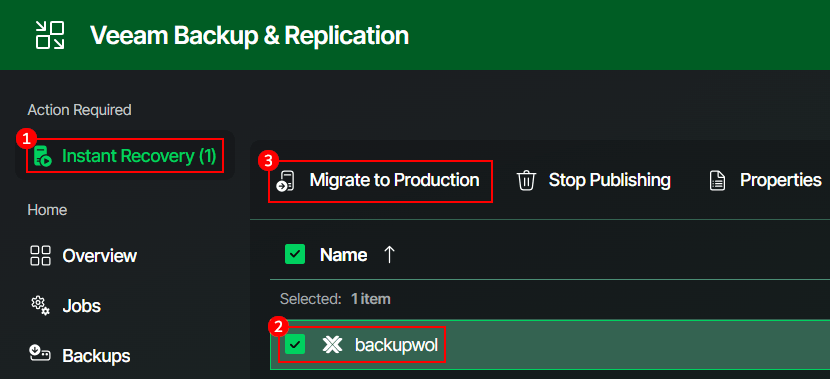
Getting the migration process underway is very straightforward however be mindful that is cannot be scheduled and will start as soon as you click the Migrate to Production button.
Click on Instant Recovery in the top left of the screen, select the VM you want to migrate and click the Migrate to Production button.
After just a few minutes the migration of my VM was complete!
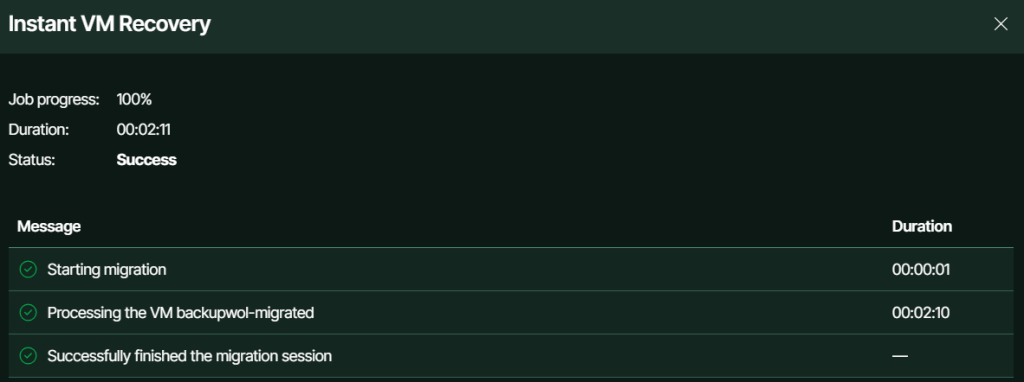
Remember though, this was performed on a small VM in a lab environment. In the real world, the time to migrate will vary depending on a number of different factors including VM size, rate of change and any resource constraints within your environment – so planning and preparation here is key.
Wrap Up
During testing, being able to handle routine Proxmox tasks directly within the Web UI was incredibly convenient. This expanded coverage is a very welcome addition as Veeam continues building out Web UI functionality to bring it closer to parity with the Veeam Console.
The new Proxmox Instant Recovery feature was similarly impressive and largely a success. The main area I found that fell short of expectations related to the post recovery steps on Windows, although these issues were more OS specific rather than Veeam related. While acknowledging that experimental support naturally comes with caveats, I believe streamlining these post recovery steps would go a long way towards a smoother experience.
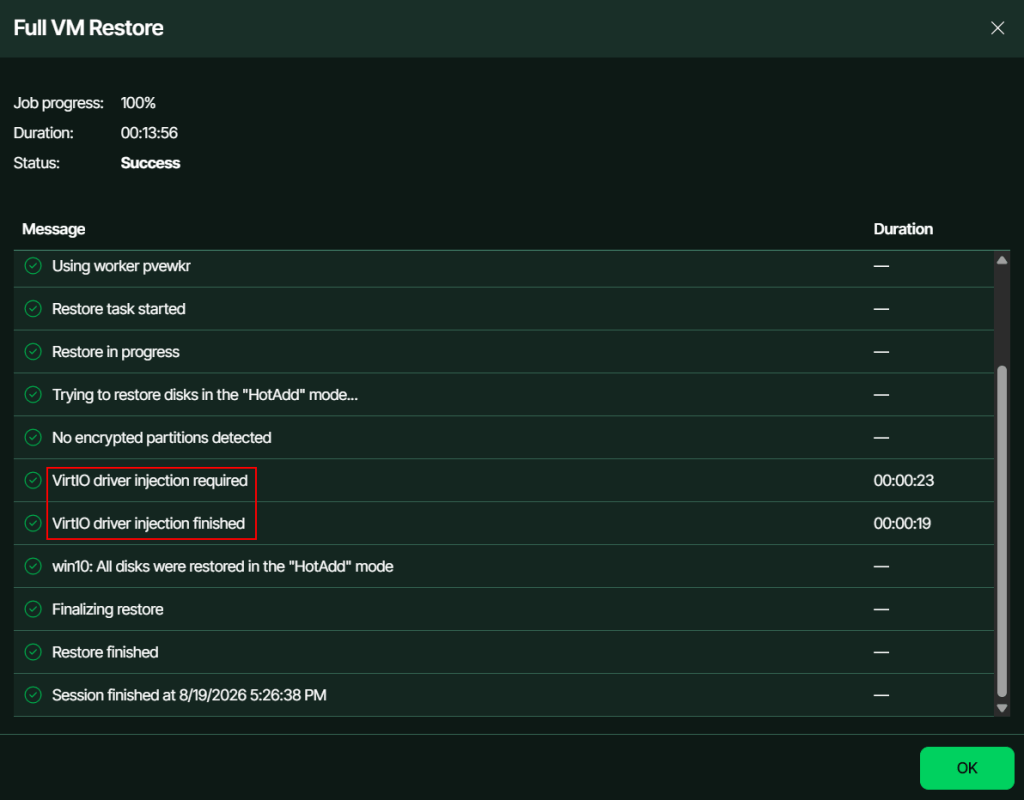
Interestingly, while Veeam 13.1 introduced automated VirtIO driver injection for Proxmox restore operations, I discovered that this capability isn’t supported for Instant Recovery yet.
As shown in the screenshot below, performing a standard full VM recovery automatically injects the required VirtIO drivers, enabling the VM to boot seamlessly without any additional manual steps. Here’s hoping this feature makes its way to Instant Recovery soon.
Overall, Veeam 13.1 is a major win for the Proxmox community and we’ve really only scratched the surface of what’s included in this release. As Proxmox Instant Recovery matures and exits experimental status, realistically this could become one of the best methods out there for migrating workloads into Proxmox.
Stay tuned for future posts as I continue testing new 13.1 features in the lab.


Leave a Reply