
Please note that this post contains content based on a beta build of Veeam Backup & Replication V13. Features and functionality may change upon final release.
During the recent VeeamON conference new details were announced around additional features and timelines for the new V13 release of Veeam Backup & Replication which I covered as part of my VeeamON 2025 Recap post. In addition, a new beta release of the software has been made available which I’ve managed to get my hands on to perform some early testing.
In this post I’ll be walking through the deployment process for the new software appliance as well as testing out the much anticipated high availability features – let’s get stuck into it!
Software Appliance Deployment
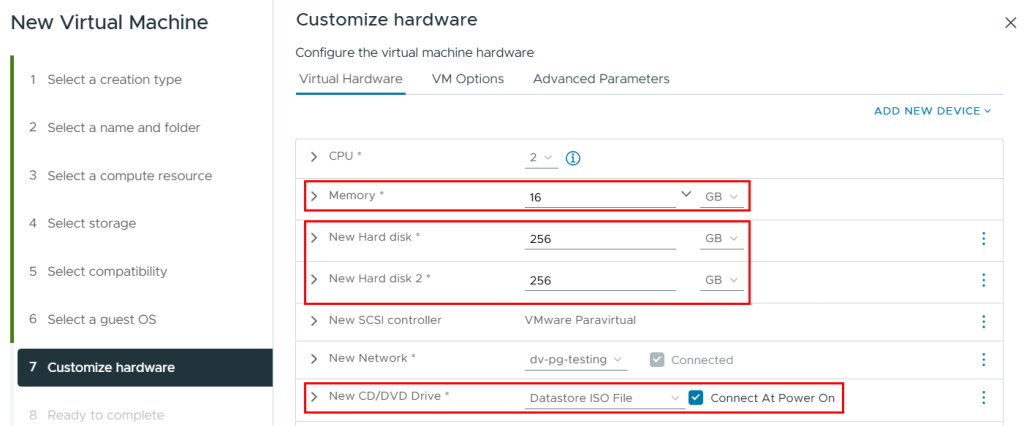
Let’s start by deploying the new Linux based software appliance which is provided as an ISO making it possible to be installed on virtually any type of hardware. In this case, I’m using a VMware vSphere virtual machine. The appliance OS is based on Rocky Linux so I’ve selected that option during the VM creation.

The requirements for this beta build include 16GB memory and 2x256GB disks (1 for OS, 1 for data). The disk capacity requirement in particular seems a little on the large size but since this is a beta built, we’ll have to wait and see if these requirements change before the official release date.
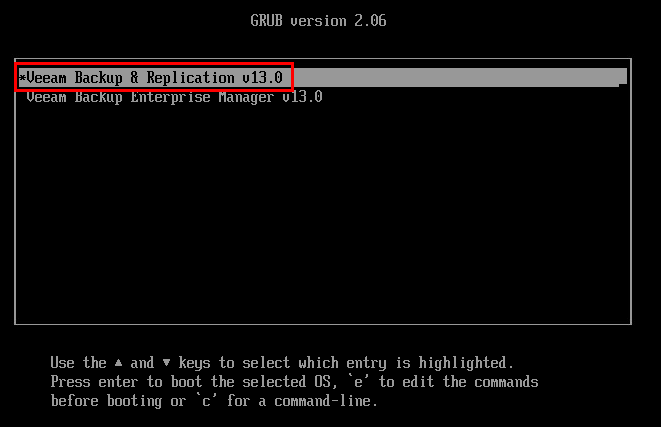
With the ISO attached and the VM powered on, we are greeted with a product selection screen where I’ll select Veeam Backup & Replication v13.0
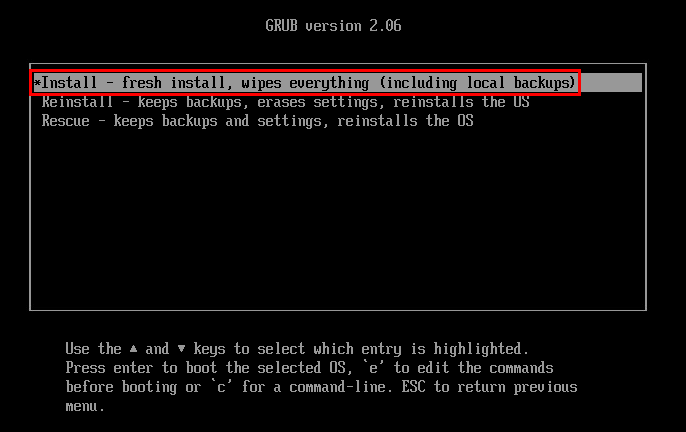
Next select the Install option
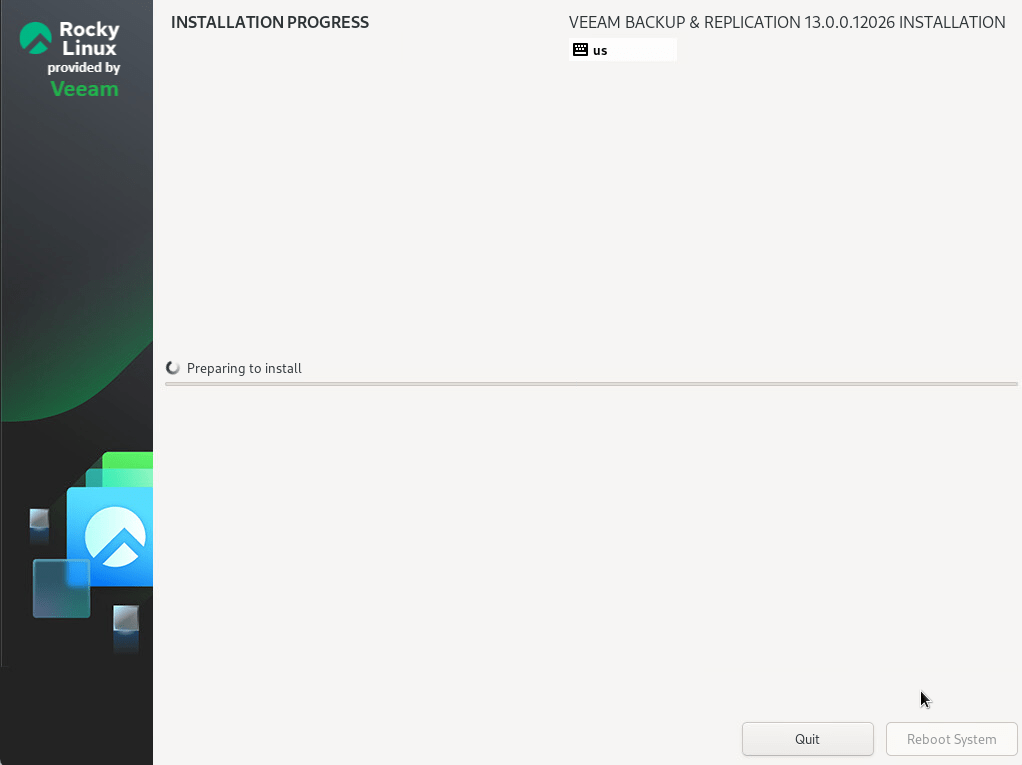
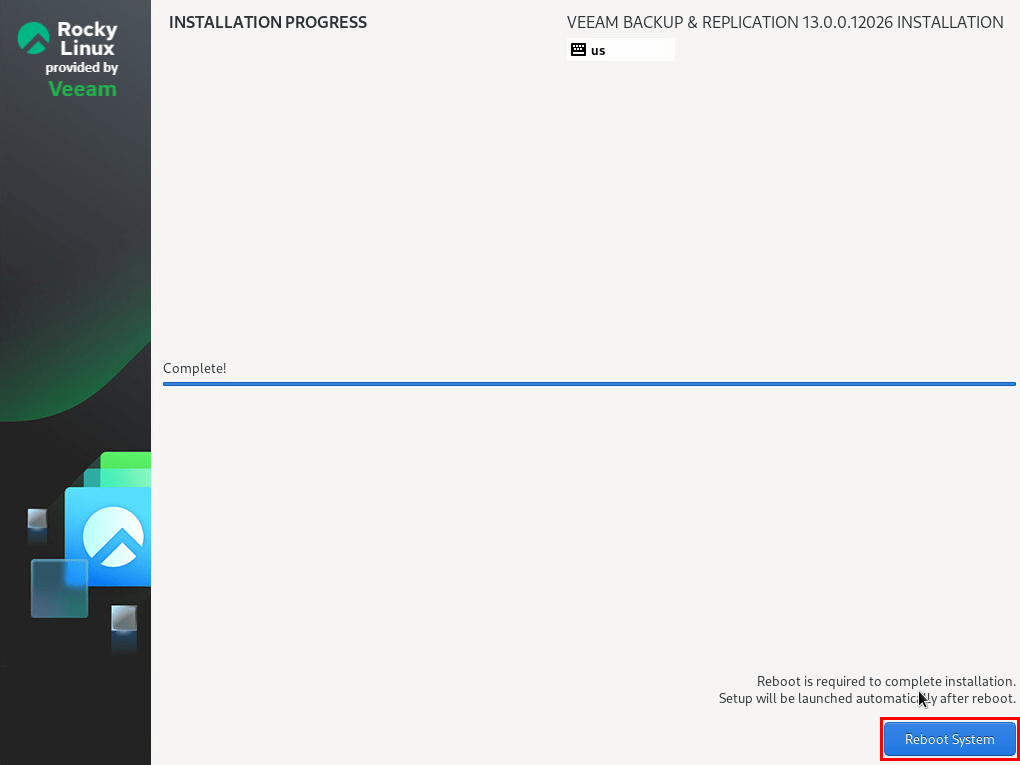
The automated installation process of the OS and VBR software begins.
Once the process is complete click the Reboot System button.
Shortly after the reboot the OS will begin to start. At this point you can remove the ISO from the VM.

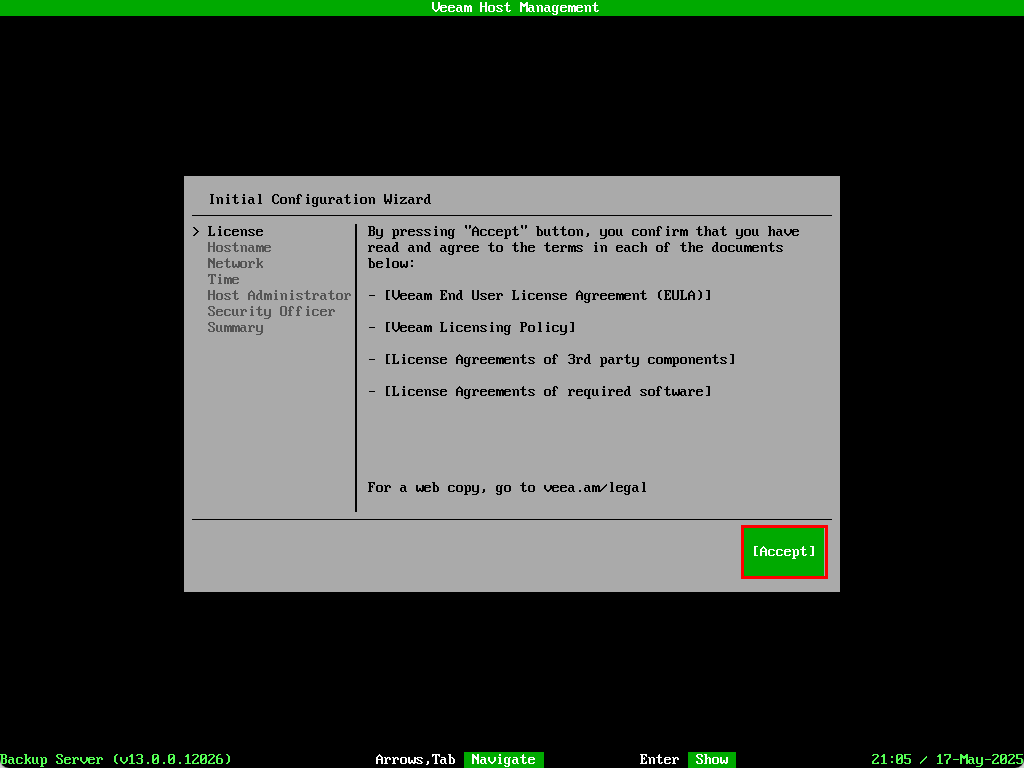
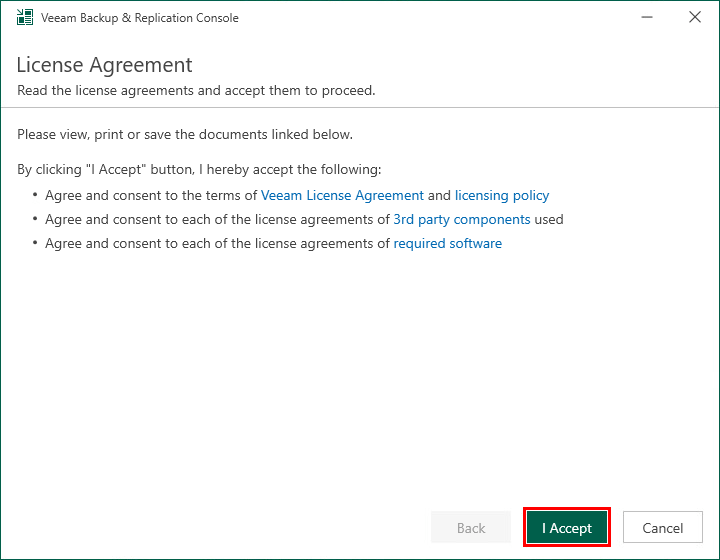
When the VBR configuration wizard appears, use the keyboard to select Accept for the license agreements.
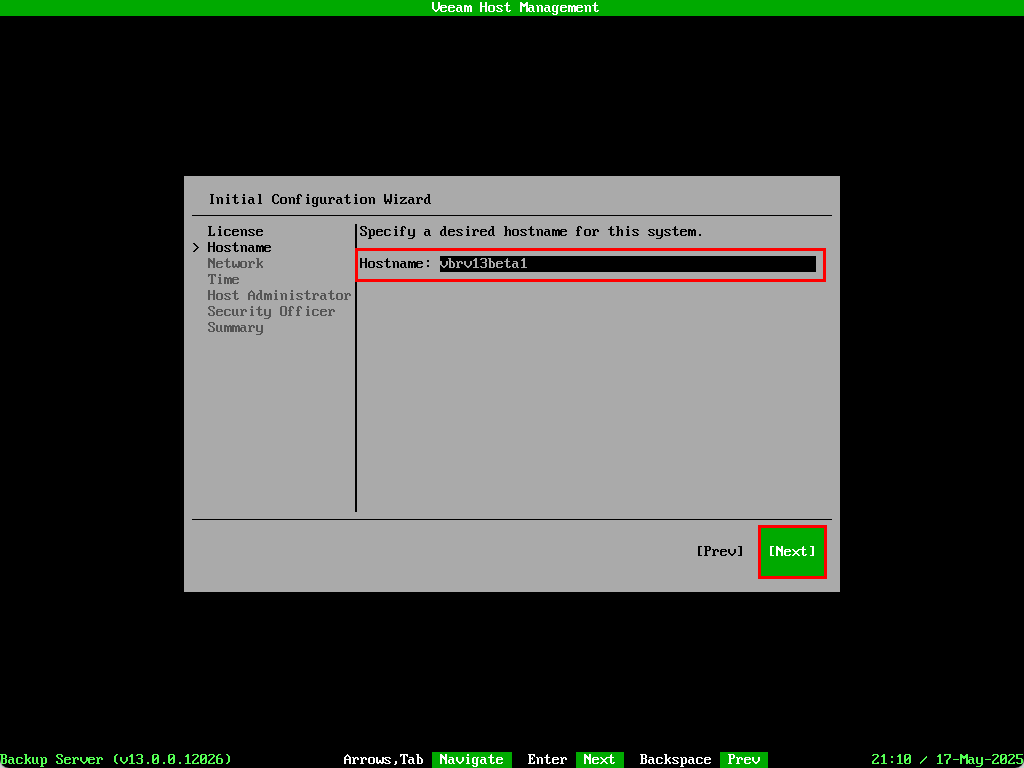
Enter a hostname and select Next
The steps for networking will differ depending on how your network is configured. I don’t have a DHCP server setup on my lab network so needed to manually assign one using the Static option.
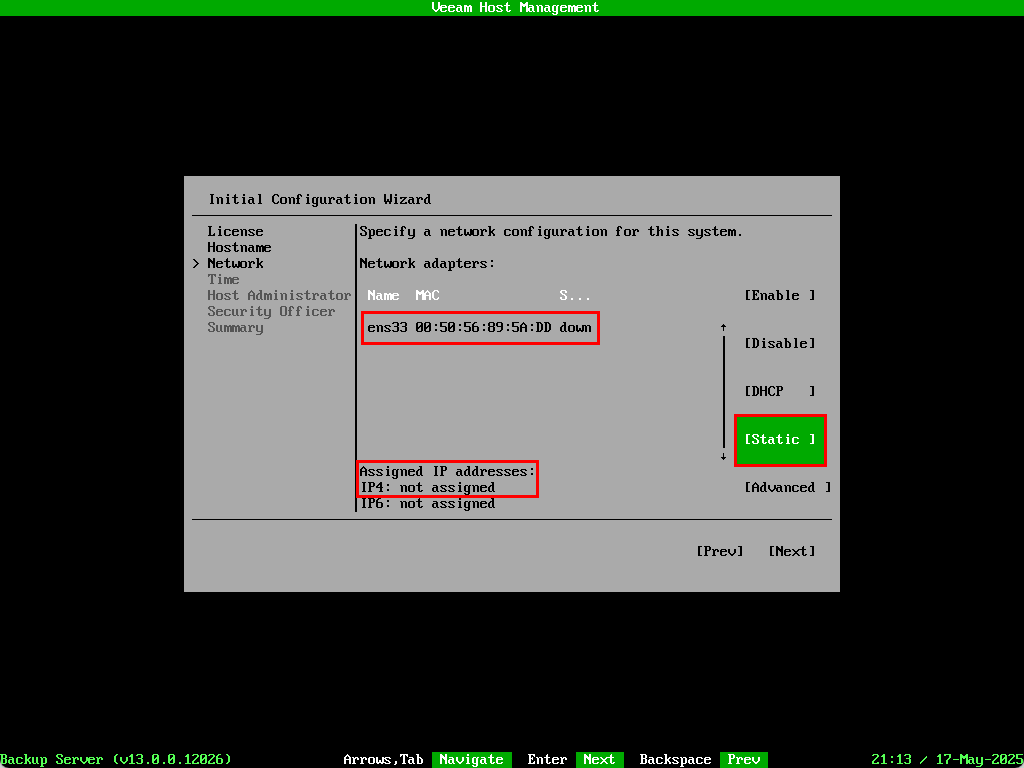
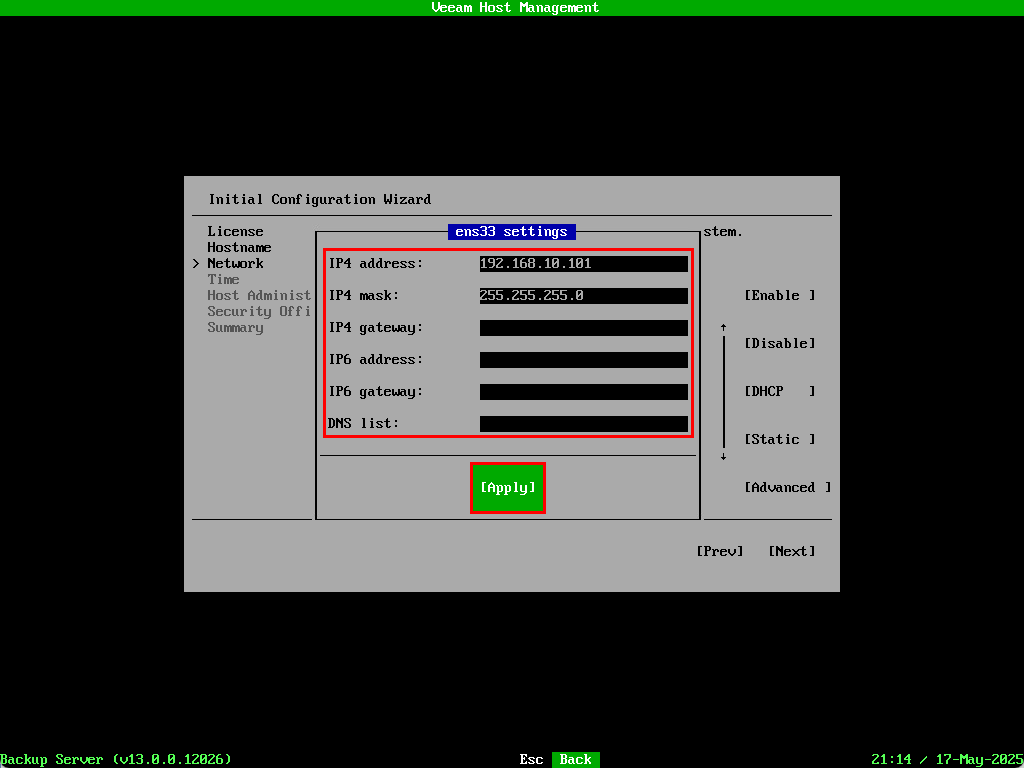
Once the IP address was applied the NIC state changed to up and the IP is assigned to the interface. Select Next to move to the next section.

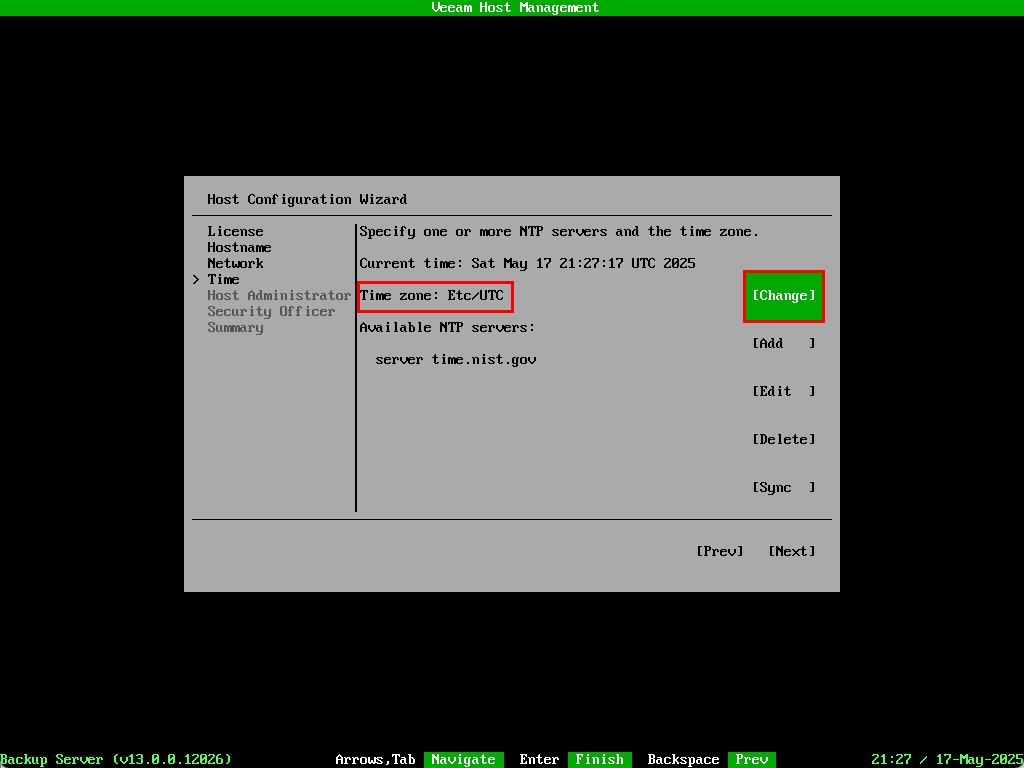
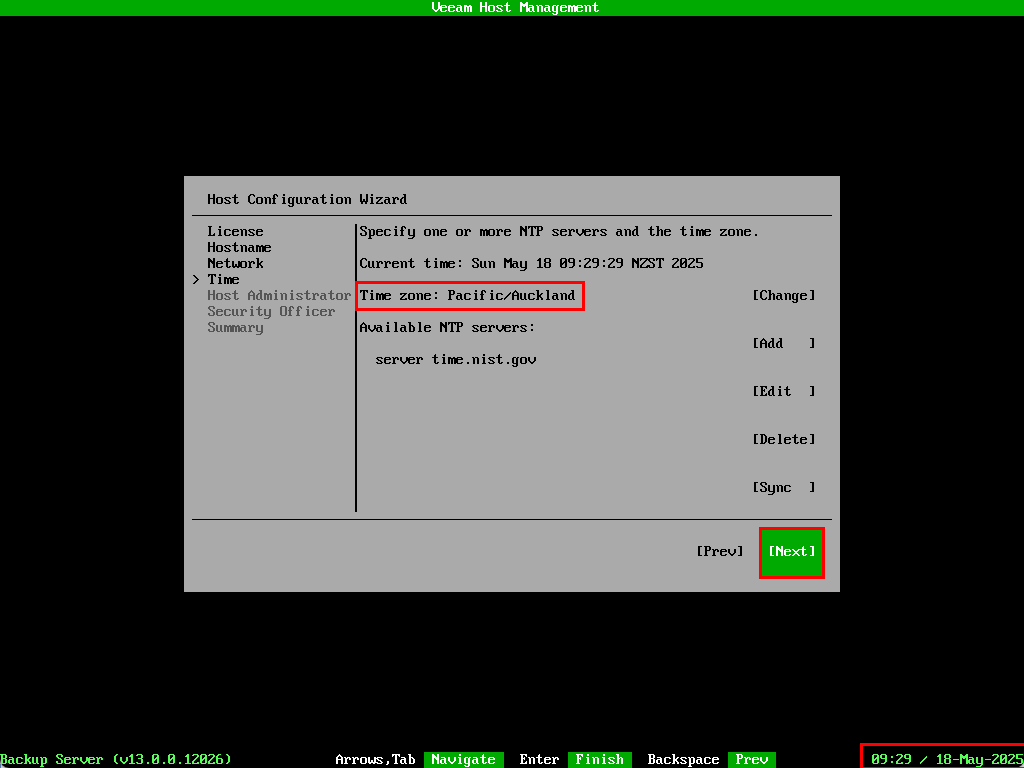
By default the time zone is set to UTC. Select Change
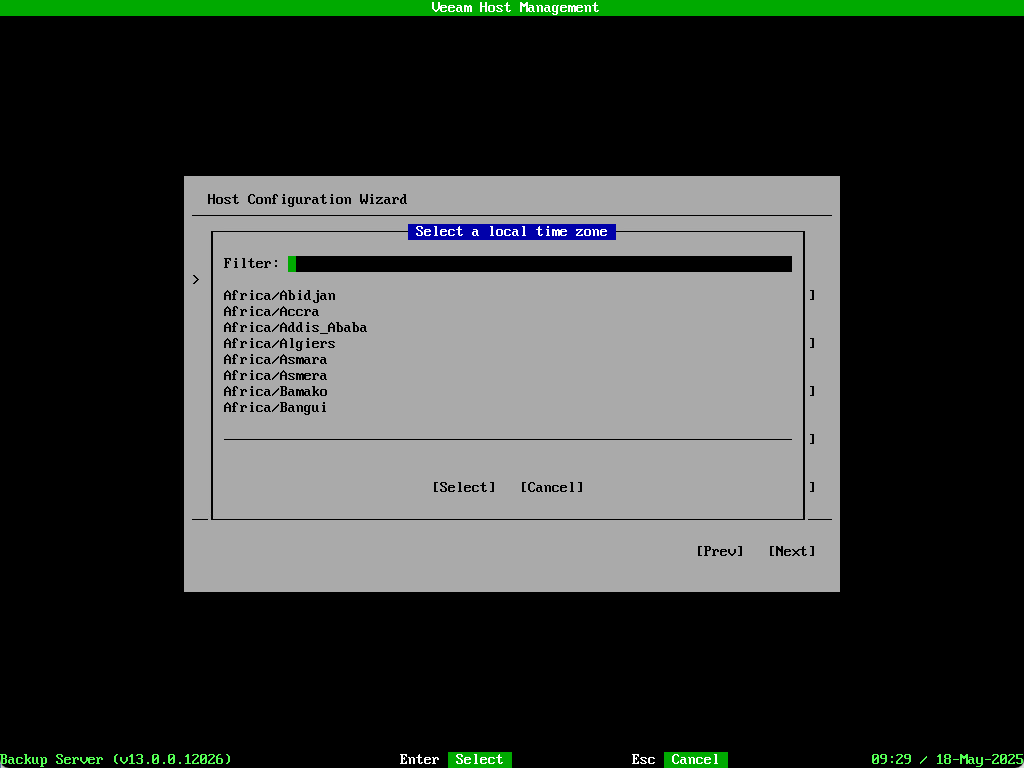
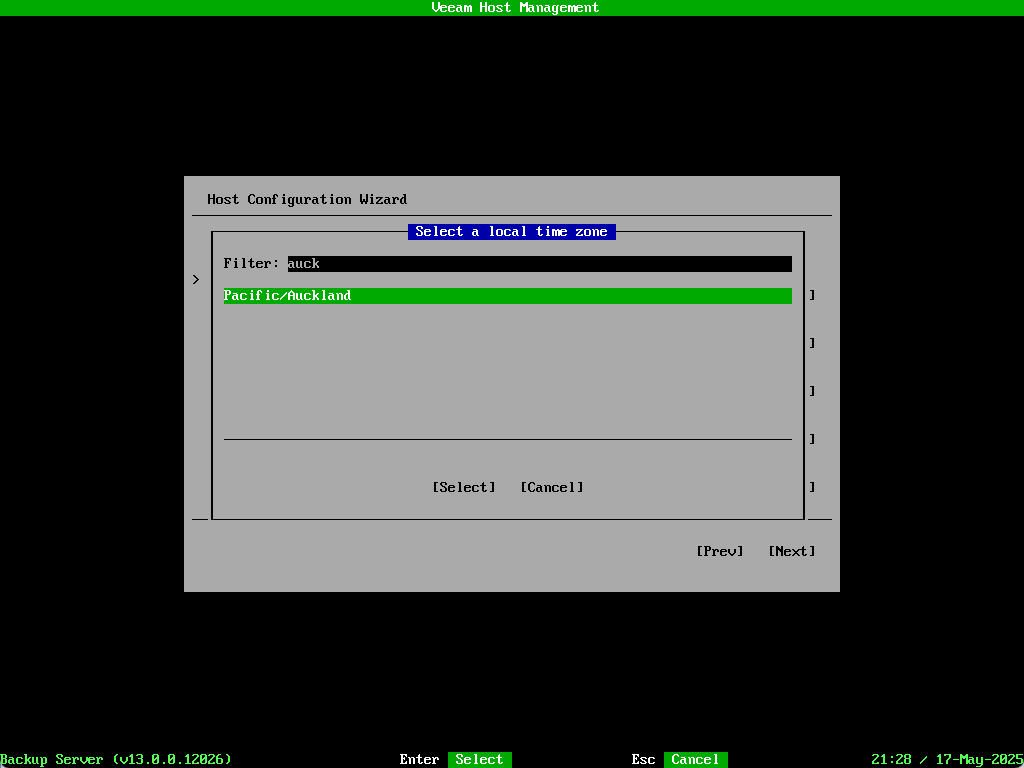
Select your time zone from the list or use the search filter.
Confirm the time zone has been updated correctly. The date/time is shown in the bottom right of the screen. You can also optionally set your NTP servers here as well. Once everything looks correct select Next
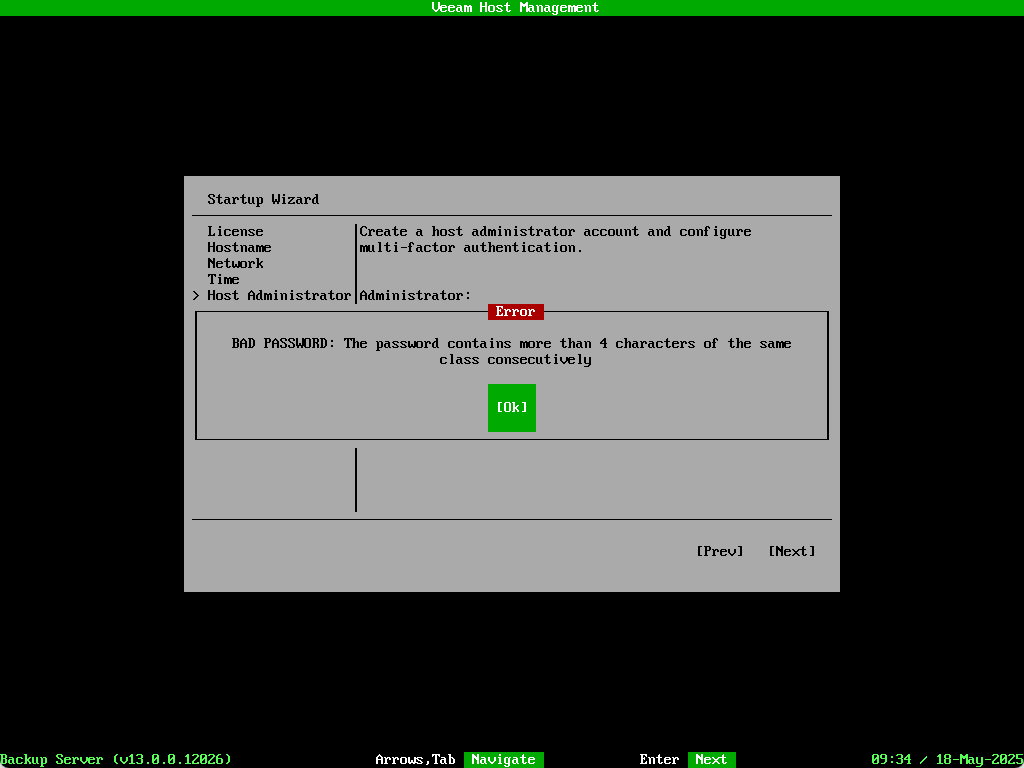
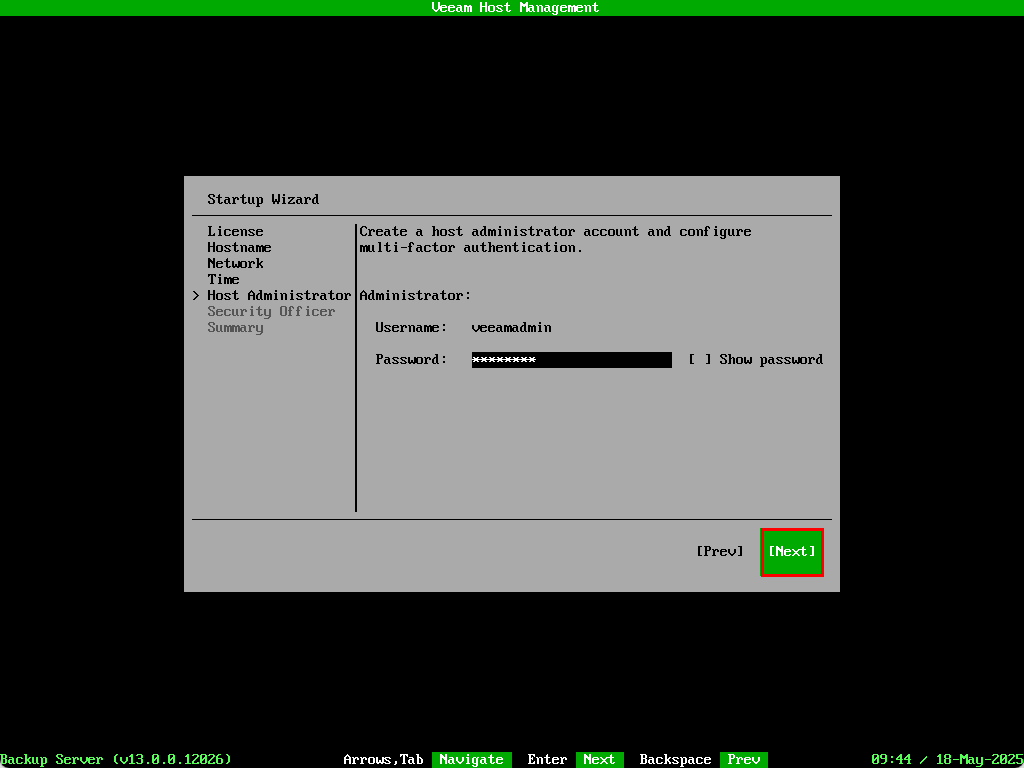
Type in the veeamadmin administrator account password. In this build you only get to type it in once so be careful not to make any typos! Select Next to continue.
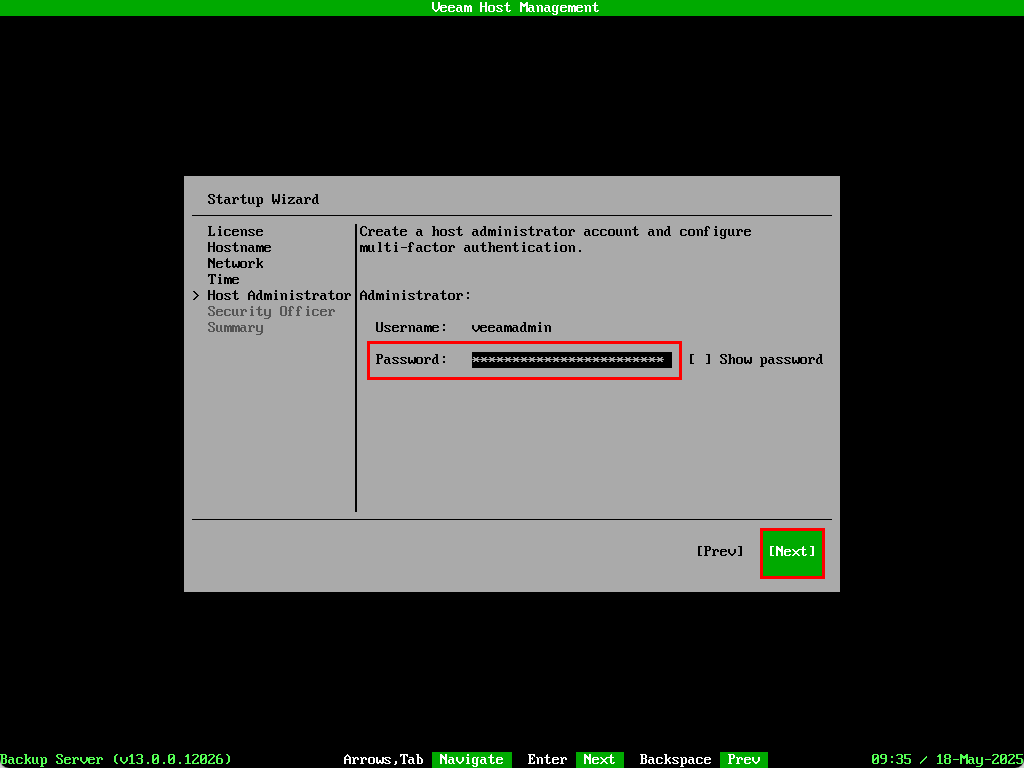
Be mindful that the appliance complies with DISA STIG. These standards have some specific criteria when it comes to password requirements.
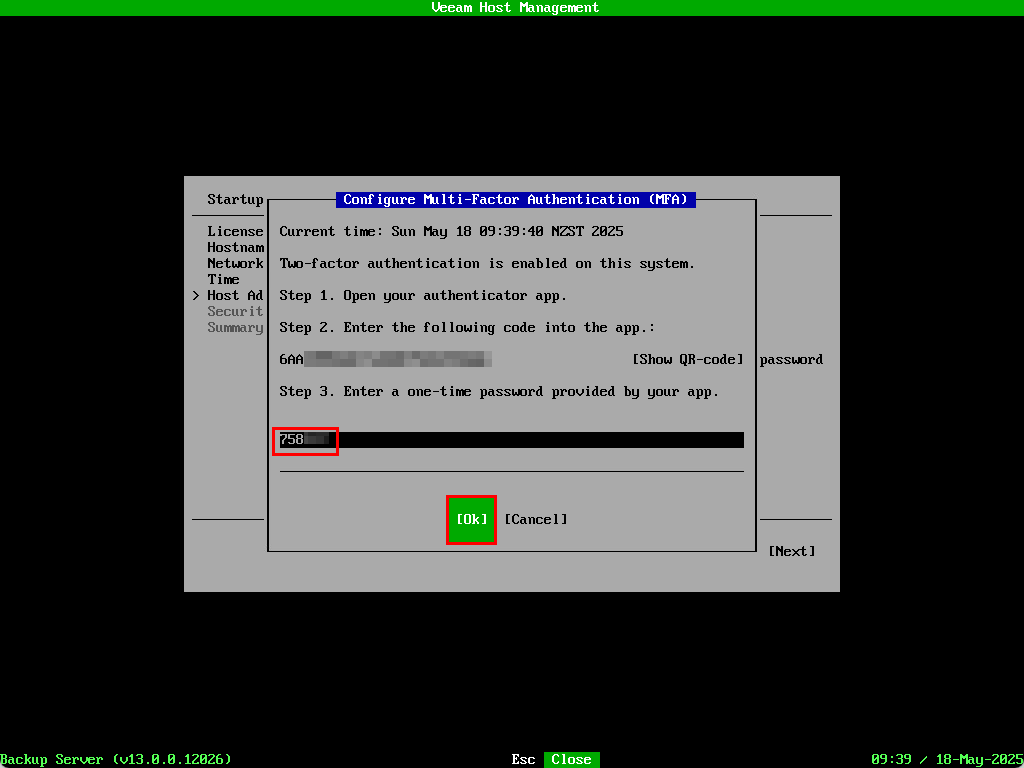
Next we need to setup MFA for the veeamadmin user. In previous versions this was just a recommendation. In line with software appliance’s security hardening, MFA is now required during the setup. Select Show QR-code and scan it with your preferred authenticator app.
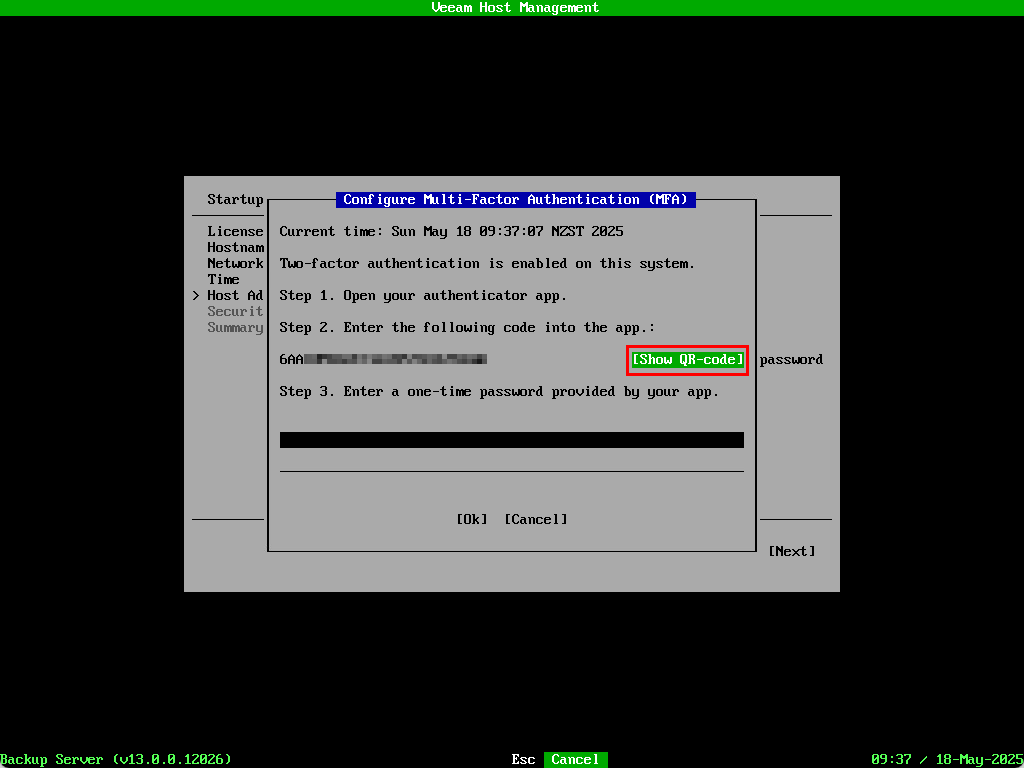
Type in the resulting TOTP code and select OK
The wizard jumps back to the host administrator screen. Select Next
The next screen configures the veeamso Security Officer account which is used for approving sensitive actions and underpins the zero trust framework the appliance is built upon.

While not compulsory, it is highly recommended that this is setup in a production environment – so much so that attempting to skip setting it up results in a bright red popup box appearing!
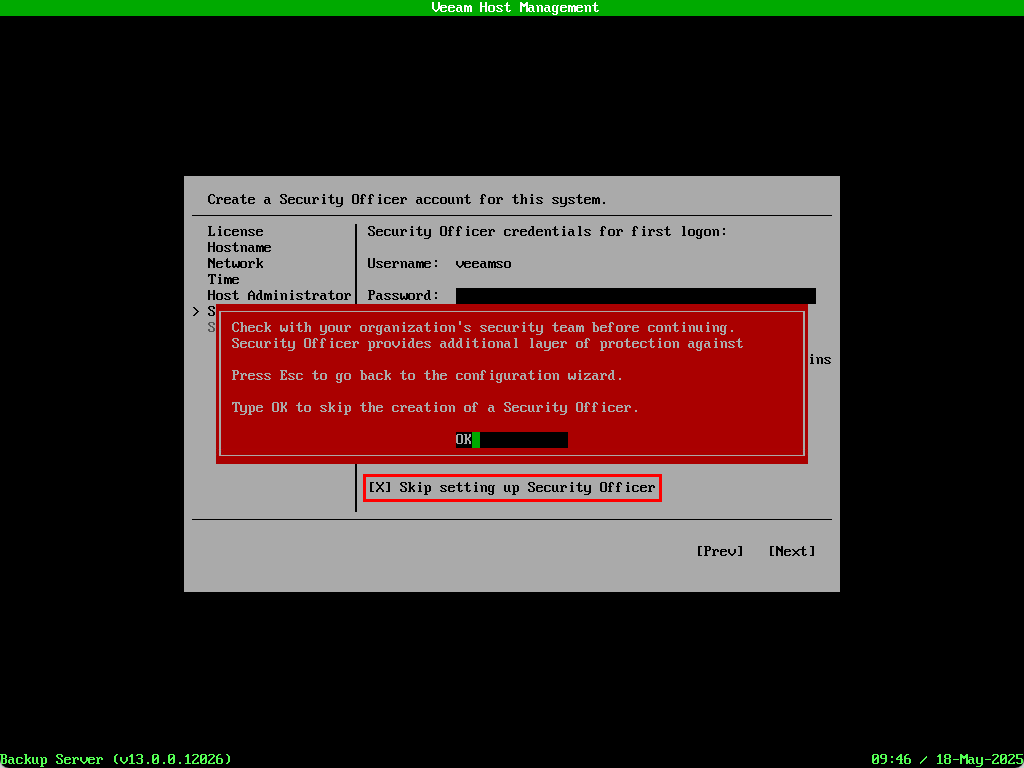
Since this is being deployed in a lab I’m going to take my chances and skip the SO setup – but on a serious note, it is worthwhile spending a few minutes to set this up and the steps involved are nearly identical to the administrator account setup above.
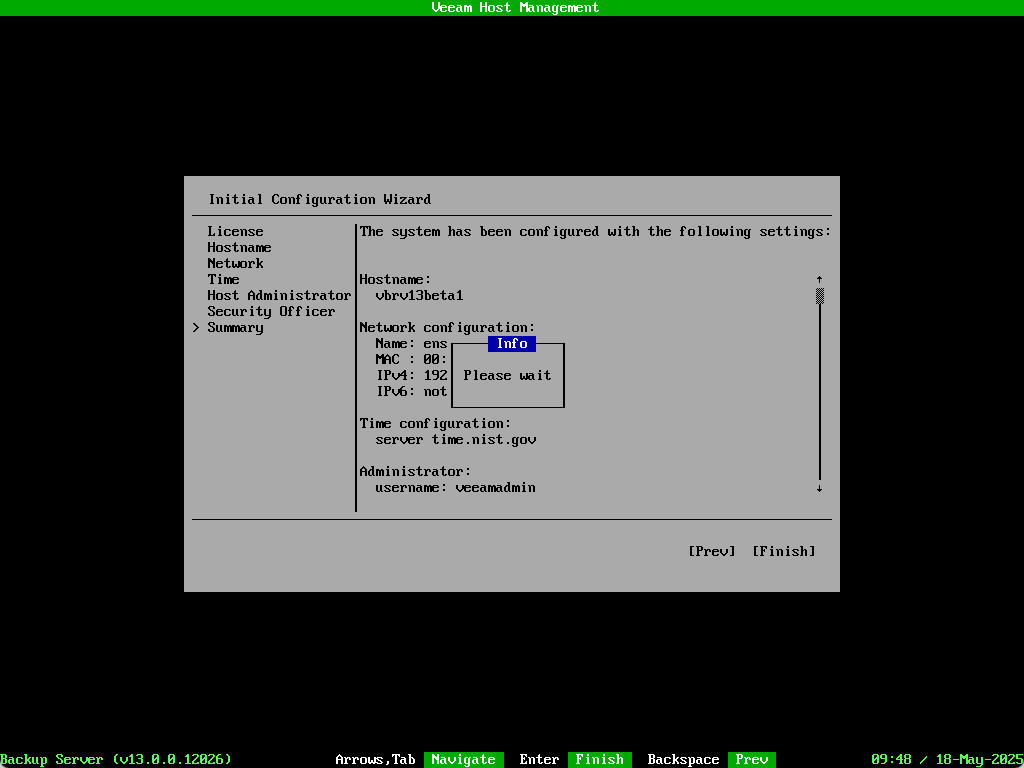
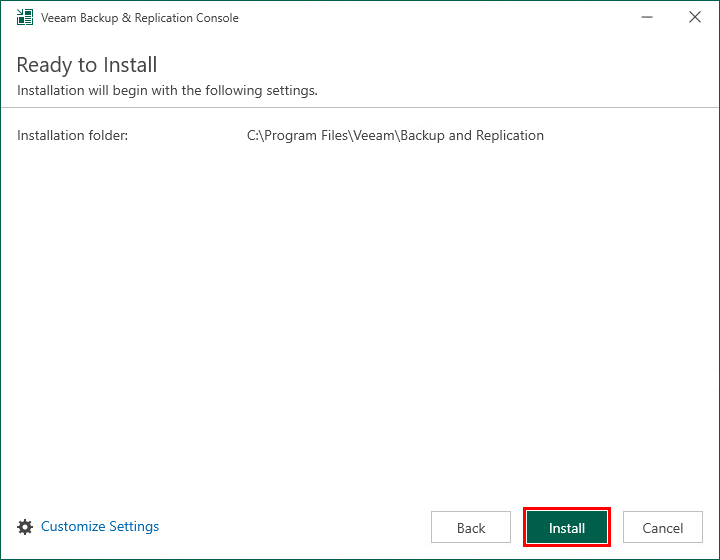
The last screen shows a summary of the configuration options selected. After selecting Finish the screen will display a Please wait message while the configuration is applied.
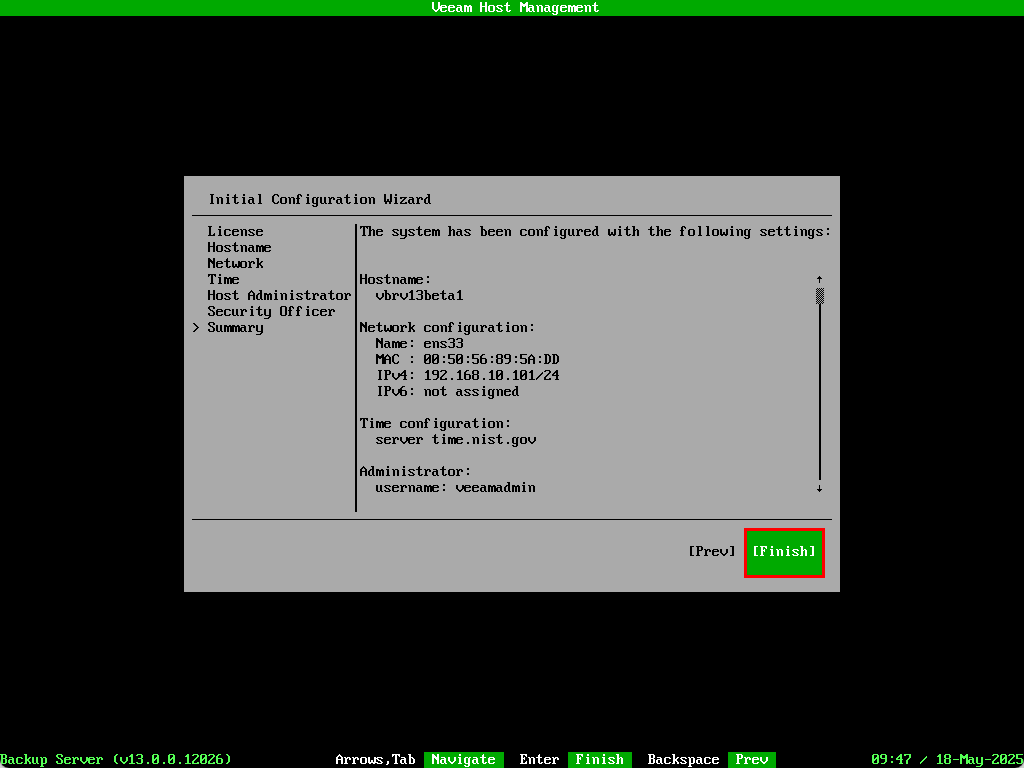
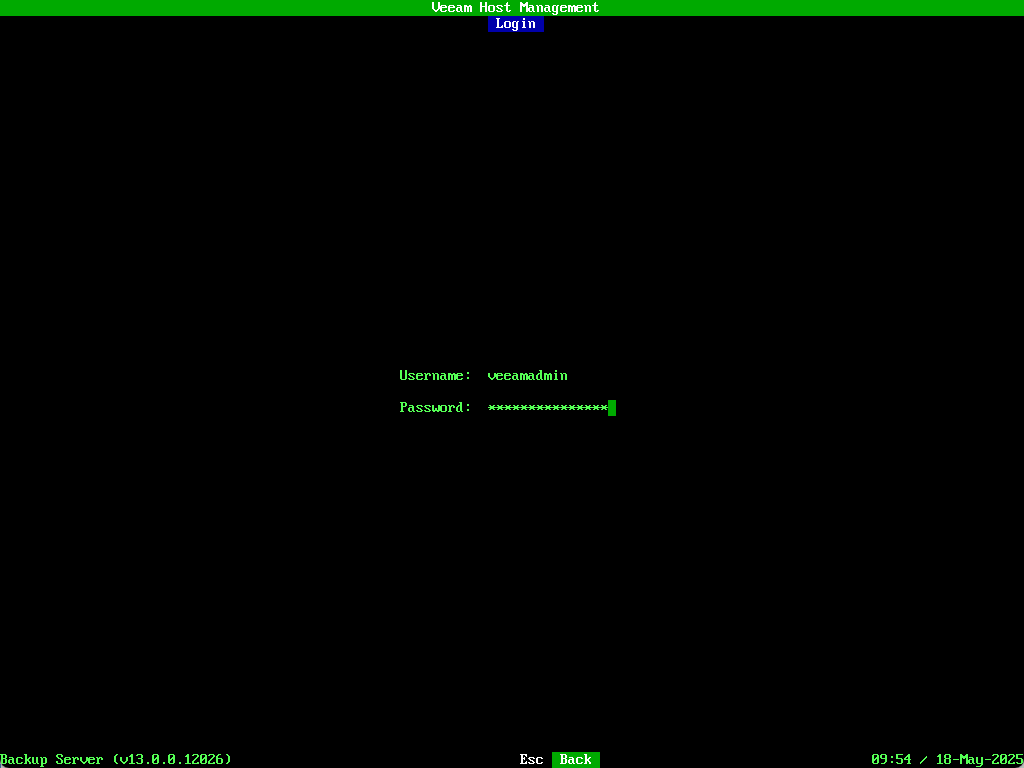
Once complete the Veeam Host Management screen will appear.

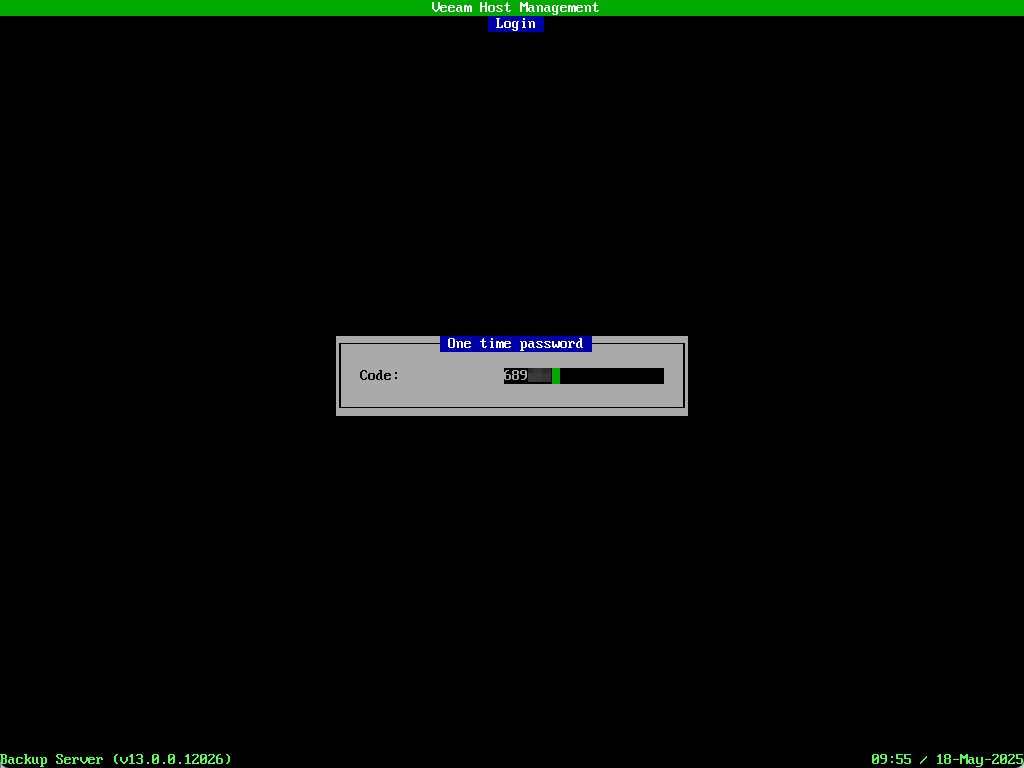
Press Enter to login. Providing administrative credentials will also request your MFA code which is a nice feature within the console terminal.
Some common tasks can be performed from here:
- HOST CONFIGURATION provides the ability to change various settings such as the hostname, networking, time etc.
- REMOTE ACCESS CONFIGURATION includes the option to disable Veeam Host Management Web UI access as well as the ability to enable shell access.
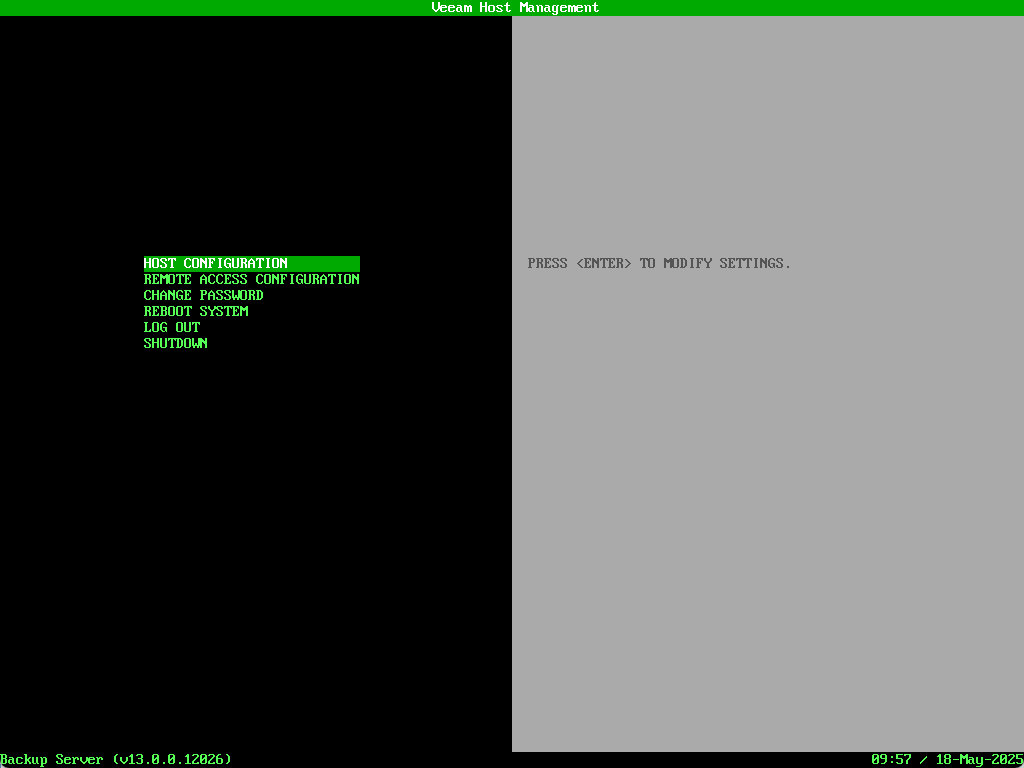
The Veeam Host Management also has a web UI version which includes most of the options found in the terminal plus some additional ones – we’ll take a look at that shortly.
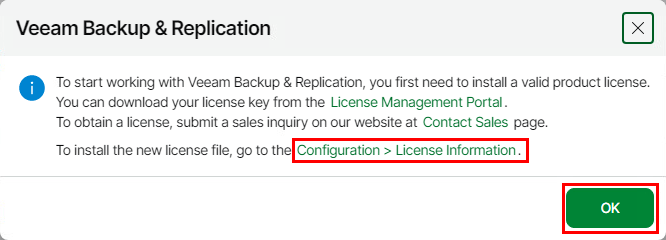
Before we go any further, the VBR instance needs to be licensed to gain access to the full set of features. This can be achieved using either the traditional Veeam console or the new web-based version which is covered in the steps below.
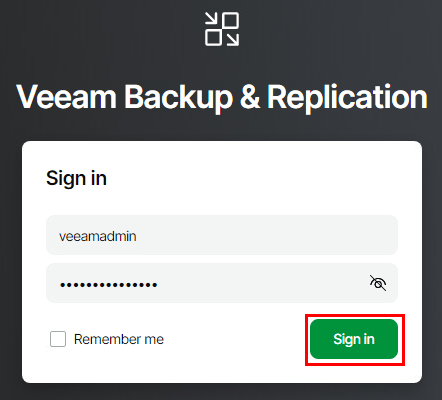
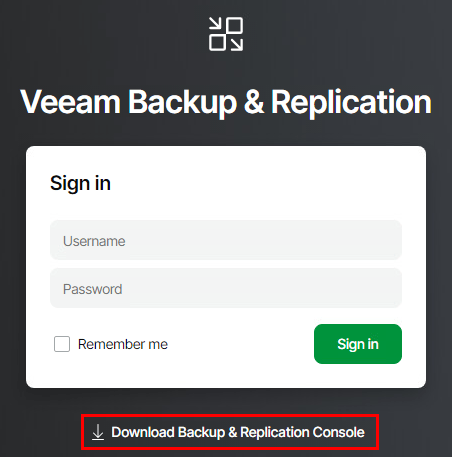
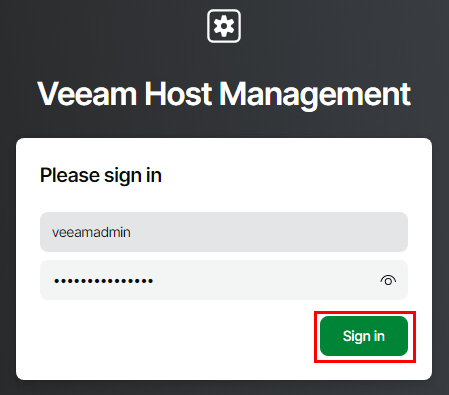
Open a browser and enter https://<software appliance IP address> then login using the veeamadmin credentials.
I did want to point out a little quality of life update here – the ability to download the installer for the full console locally! This has always been a pain point for me especially when performing new deployments into customer environments and needing internet access to download the console.
I’m going to click the link to download the console as it will be needed later on when we look at high availability.
A license popup should appear right after logging in. Clicking the Configuration > License Information link will open a new browser tab taking you to that section in the web UI. Click OK to close the popup box.
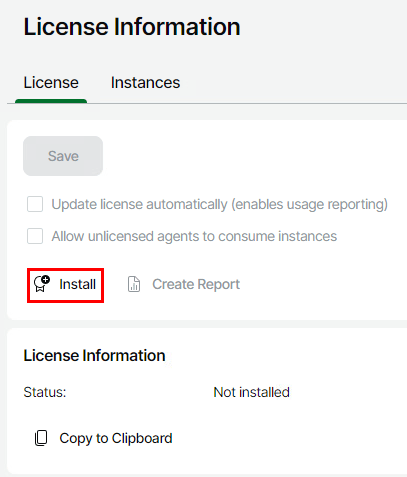
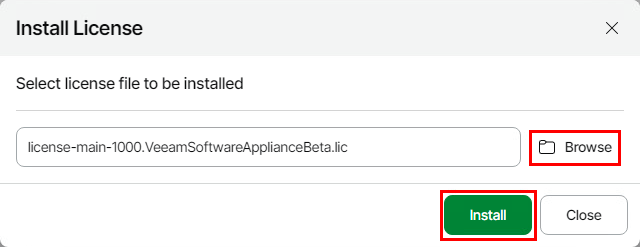
Under the License Information section click Install
Click Browse and select the relevant license file then click Install
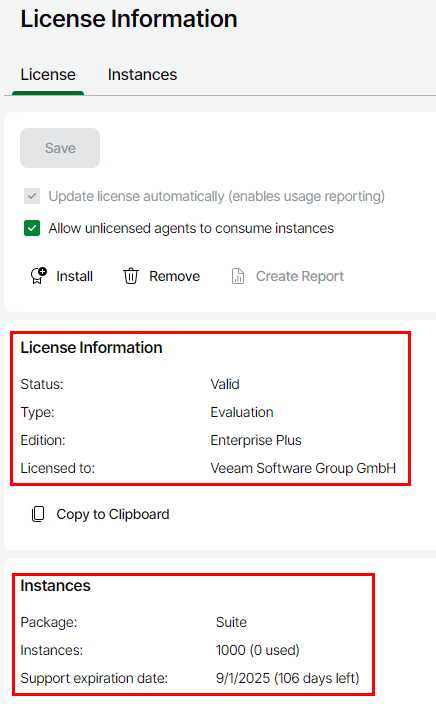
The License Information updates to include the details for the installed license.
Click Exit Configuration to go back to the main Overview page.

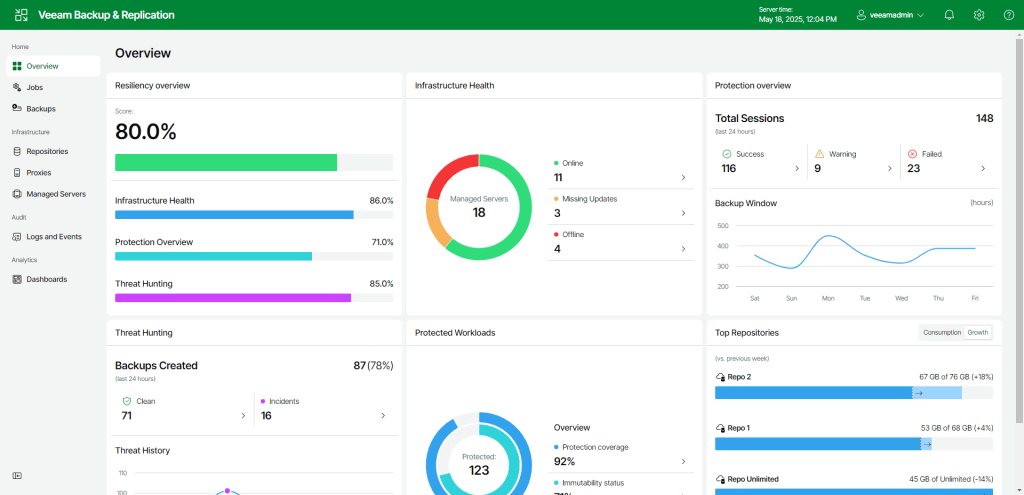
The Overview page has a really nice, streamlined look and although the graphs are prepopulated in this build to show off the visual effect, it showcases what we can expect in the final release.
High Availability
As VBR has evolved over the years supporting workloads such as CDP with extremely low RPOs, it has become a critical component of an organisations infrastructure. Up until now, the supported method for restoring a VBR instance involves recovering from a configuration backup which isn’t always a quick and straightforward process.
Although HA feels like it has been a long time coming, I’m stoked to see it included as part of the upcoming release. This beta release provides the ability to create a highly available VBR instance with failover capability to a secondary node.
The beta version does include some limitations – whether these are addressed before the final built is yet to be seen.
- No automatic failover – a manual failover must be performed in the event the primary node goes offline
- Support for a maximum of 2 nodes
- Nodes must be in the same subnet
Let’s also have a look at the requirements to setup HA:
- 2 VBR V13 instances – the steps to setup the second instance are identical to the first with the exception of needing to install a license
- 1 available IP address to assign to the cluster
- HA request submitted and approved on both nodes
- VBR console to setup HA and perform failover operations
Assuming we now have 2 VBR instances running and a cluster IP address ready to assign, let’s walk through the remaining steps to setup HA.
Remember earlier I mentioned the Veeam Host Management Console could be accessed via a web UI? Let’s log into it and submit the request to configure HA.
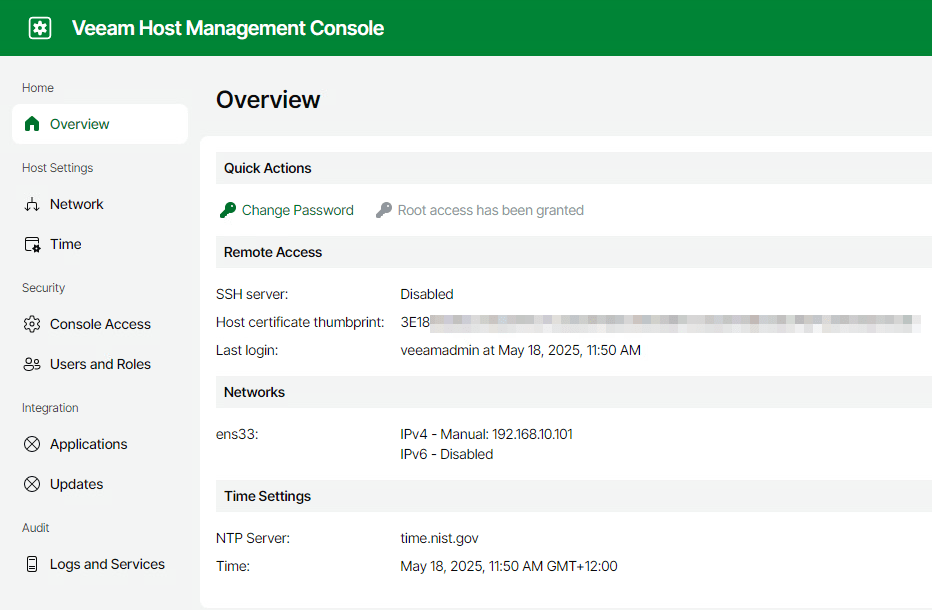
In a browser tab go to https://<software appliance IP address>:10443 and login using the veeamadmin credentials.

After login you are taken to the Overview page which shows some useful configuration details about the appliance.
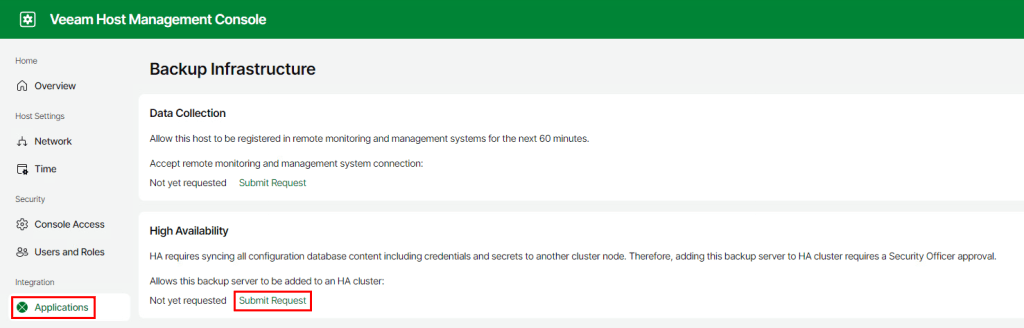
Click on Applications then under the High Availability section click Submit Request. This would normally fire off a request to the Veeam Security Officer account for approval however in this case the approval is instant since the SO account isn’t being used.
Once approved, the request is available for the next 1 hour.

Repeat these steps for the second VBR instance.
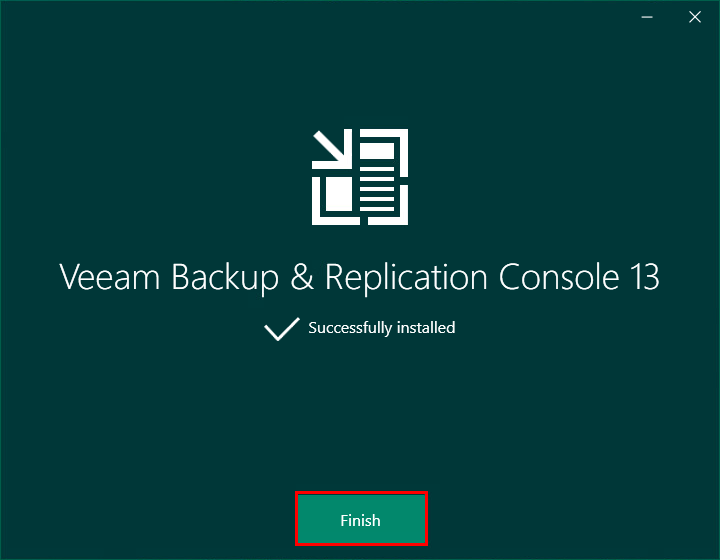
To setup the failover cluster we need to use the VBR console. The install steps for the new V13 console have a very similar feel to the current V12 version.
One thing I did find with the V13 installer is a lack of compatibility with Windows 10, however installing on Windows 11 worked without any hiccups.

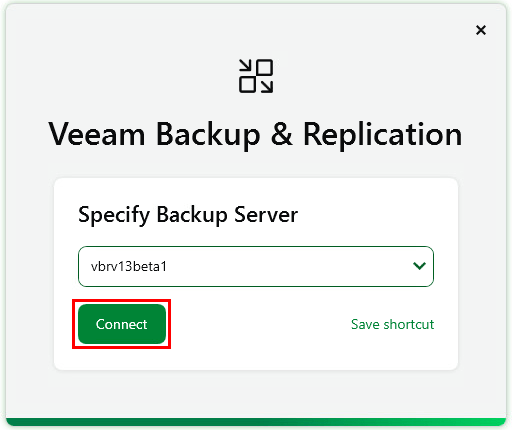
Open the VBR console and log in using the primary node’s IP or FQDN
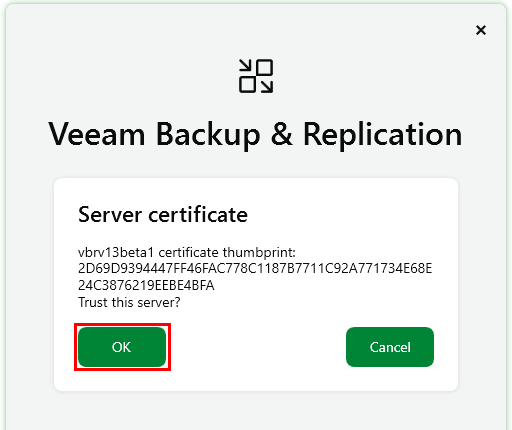
As it’s the first login attempt we need to trust the server’s certificate.
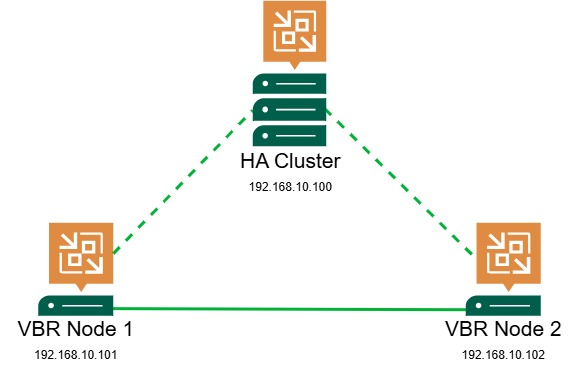
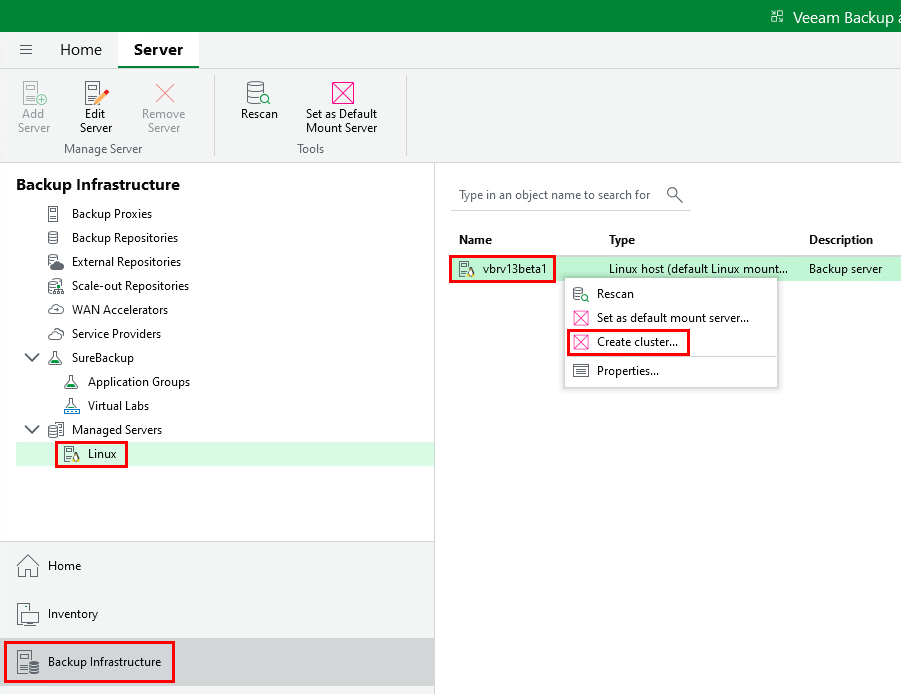
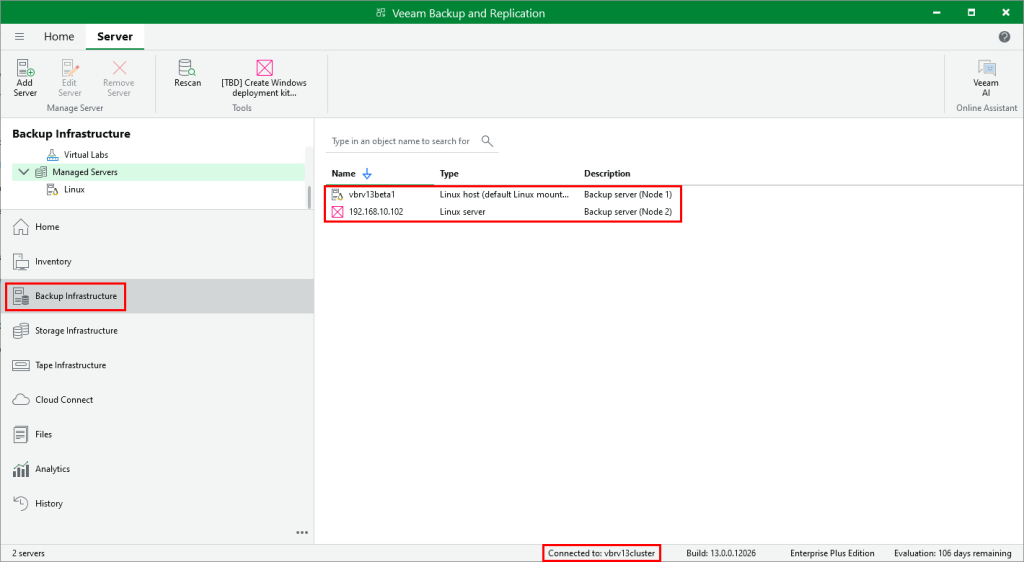
To create the cluster head over to the Backup Infrastructure section then under Managed Servers select Linux. Right click the Backup server in the list and select Create cluster to open the HA Cluster wizard.
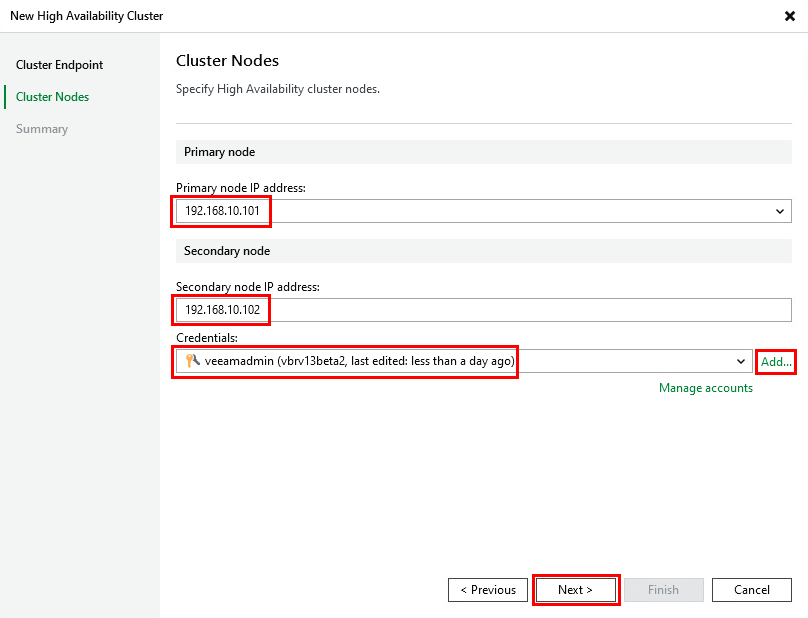
Start off by entering the IP address to be assigned to the cluster

Next we will configure the cluster nodes. Select the primary node IP address from the dropdown box. For the secondary node we enter in the IP address assigned to the secondary VBR instance. Lastly, provide credentials for the secondary VBR instance (using the veeamadmin account).
On the summary screen click Finish
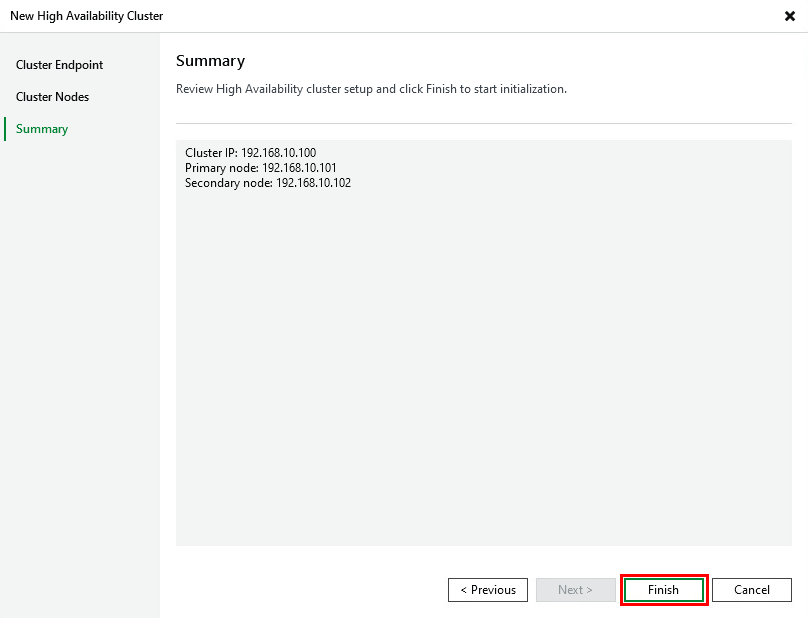
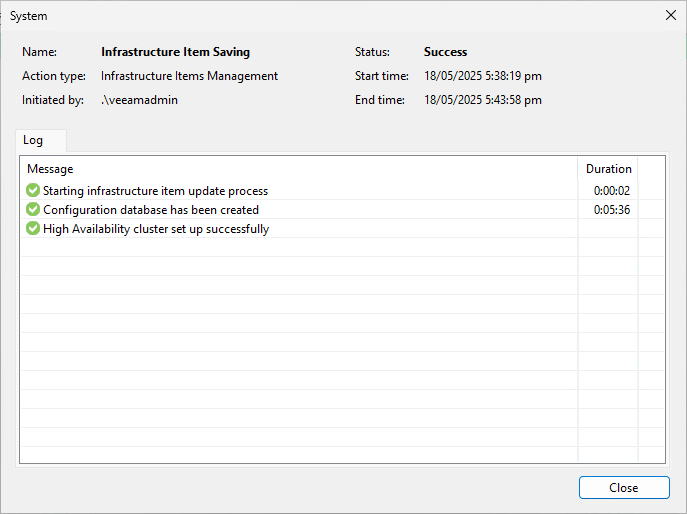
Wait while the cluster is configured for both nodes which can take a little while – just over 5 minutes in my case.
Once complete close the console and reconnect using the cluster IP or FQDN using the same veeamadmin credentials as before.
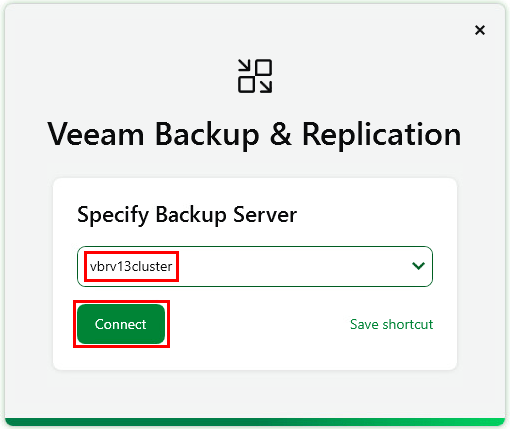
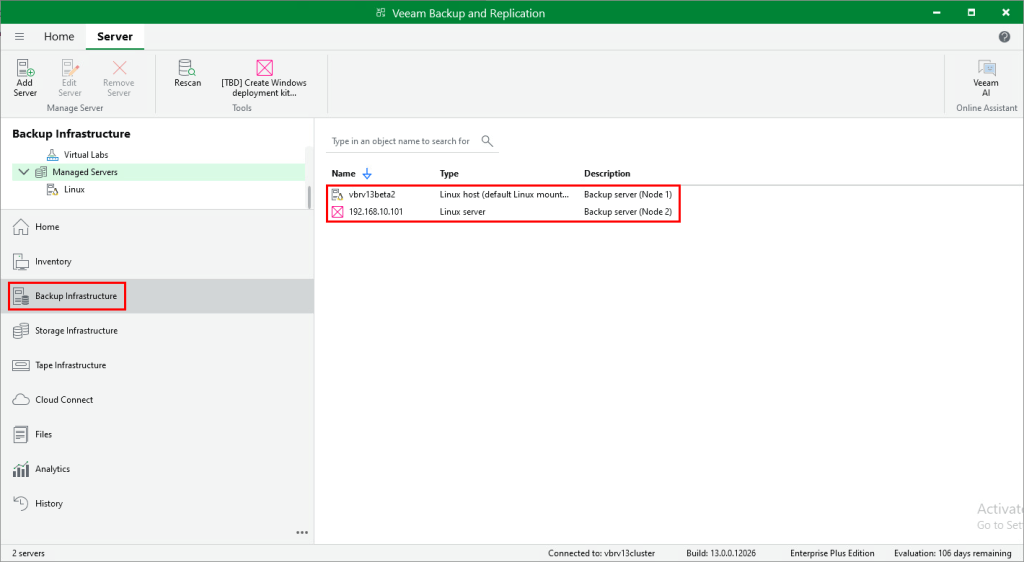
We are now connected to the cluster IP/namespace as shown at the bottom of the console window. If we head back to Backup Infrastructure > Managed Servers it now shows both nodes in the list.
Performing a Switchover
A switchover is a planned failover between nodes and can be useful in certain scenarios such as planned maintenance, compliance testing etc.
To initiate a failover, select the secondary node in the list and click Switchover
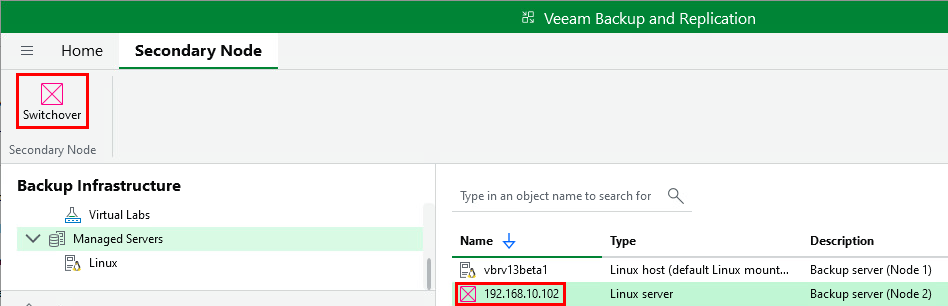
The below popup will appear. In a planned failover scenario it is advised that there are no jobs running. Click Switchover – this confirms the operation but does not start the switchover just yet.

Once the OK button on the next popup box is clicked the console will close and the switchover process will begin.

There doesn’t appear to be anyway to monitor the process of the switchover operation just yet other than perhaps looking through the logs.
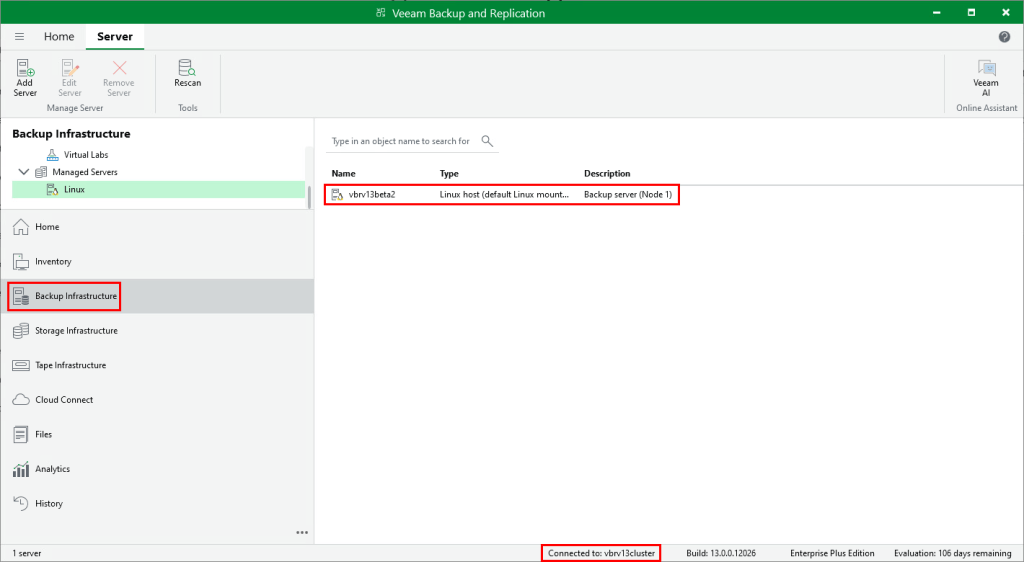
After waiting about 5-10 minutes I reopened the VBR console and connected again using the same cluster IP/FQDN. Once logged in, you can see the switchover was successful, with the secondary node now showing up as the primary.
Performing a Failover
Next let’s have a look at the process to perform a failover. To demonstrate this, I’ve simulated an unplanned event by powering off the primary node in my environment. Attempting to connect to the cluster’s IP/FQDN fails and a message appears suggesting to connect the secondary node .
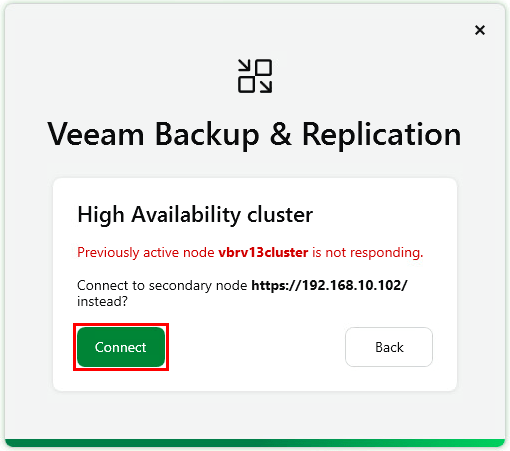
Clicking Connect prompts for credentials to login to the secondary node.
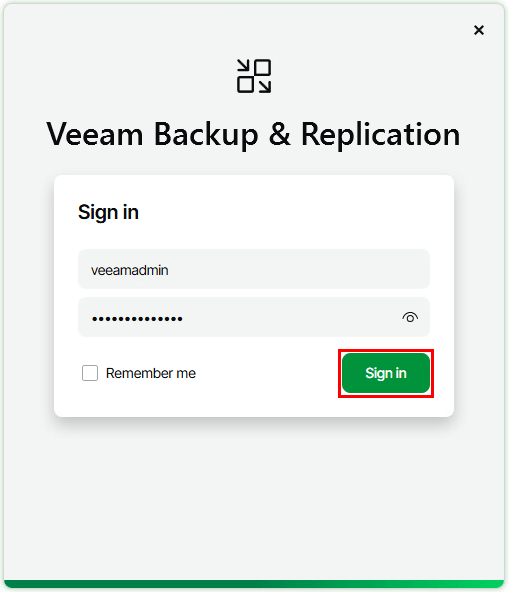
After logging in the failover operation can be initiated by clicking Failover
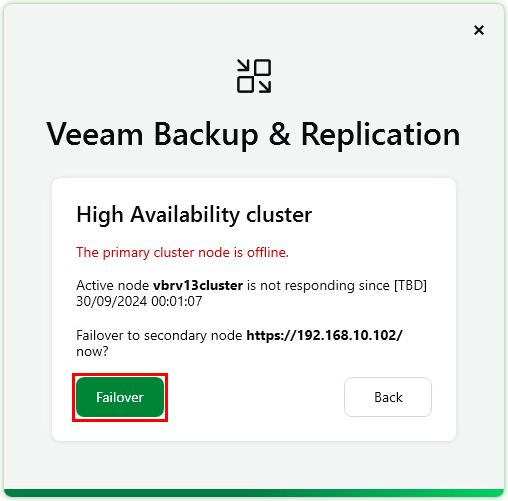
Once the failover is complete the console opens and we can see that the secondary node has been successfully promoted to be the primary.
Wrap Up
Although still in beta, you can see the potential V13 offers and it’s a completely different experience to any release we’ve seen before. I found deploying the new software appliance a relatively simple experience and for a first iteration, I’m impressed with the capabilities of HA. Sure, there are some current limitations which slightly limit the practicalities of HA but I’m hopeful these will be addressed in the near future. With more development work happening over the coming months, I look forward to seeing the final result towards the end of the year.
