
As the year draws to a close and with Christmas almost upon us, Veeam has kindly dropped off an early present to us all with the release of Data Platform 23H2 Update as covered in their Resiliency Summit event a few months back.
Although the main headline for most will be Backup & Replication, it is worth mentioning that new versions have also been released across most of the product range:
- Veeam Backup & Replication v12.1
- Veeam ONE v12.1
- Veeam Service Provider Console v8
- Veeam Backup for AWS v7
- Veeam Backup for Microsoft Azure v6
- Veeam Backup for Google Cloud v5
- Veeam Backup for Microsoft 365 v7a
- Veeam Recovery Orchestrator v7
Since I covered some of the upcoming features for Backup & Replication v12.1 in my last blog post, I thought it would be nice to put a few of them to the test. As always, I highly recommend reading through the release notes for 12.1 first to check for anything that could impact your upgrade process. This post will be focused around the new features so I won’t cover the upgrade process itself, but it is well documented by Veeam:
Malware Detection
Recently it seems that not even a week can go by without reading about a large organisation being hit by ransomware in the news. Regardless of how the breach occurred, backups are the last line of defence for many organisations. But even with backups in place, how certain can you be that the data they contain is not compromised?
v12.1 sees Veeam step up their security feature set by adding malware detection to the mix which is probably one of the headline acts in this release. Veeam has always given us the ability to recover from an attack but the new malware detection feature makes detecting these attacks earlier now possible.
So, let’s put it to the test then. Here I’ll be looking specifically at the detection methods that run during a backup job. Both of these features are configurable from the new Malware Detection option under the main menu.

Under the General tab are two types of detection methods which I’ll cover below.

Suspicious activity detection
You will notice that this detection method is already enabled by default. It detects malware by comparing file signatures from the guest file system collected during a backup against a list of known suspicious file types. It also checks the signatures against those from the previous backup job run to determine suspicious activity where certain conditions are met:
- Multiple files renamed by malware – 200 renamed files with the same or different extensions
- Multiple files deleted by malware – at least 25 files with specific extensions or 50% of files with specific extensions are deleted
This all happens in the background after the backup job has completed meaning that detection is not instantaneous. In order for the detection to process objects, the Enable guest file system indexing option must enabled and configured within the backup job.
Any malware activity that is detected will result in a malware detection event which marks those objects as Suspicious.
Encryption detection
This detection method uses file entropy analysis (the randomness of the data in a file) to determine whether malware is present by checking for encrypted files. With this method, the backup proxy associated with the backup job extracts metadata from the data blocks which are then analysed for malware in the background after the backup job has completed.
Malware detection is determined by the sensitivity setting in the UI – this is something you may need to tweak in order to reduce false positives. Note that enabling this detection method has no other pre-requisites however be aware that Veeam states it has the potential to consume a large amount of system resources on the proxy server.
Any malware activity that is detected will result in a malware detection event which marks those objects as Suspicious.
I want to reiterate that neither of these detection methods are designed to detect malware in real time nor are they guaranteed to detect malware 100% of the time.
Testing
In my lab I have both encryption detection and suspicious activity detection enabled and a backup job configured with Enable guest file system indexing enabled. Next we need a way to trigger a malware detection event.
DISCLAIMER – I won’t go into any detail on how to trigger malware detection. Testing was performed on my own equipment in a controlled, sandboxed environment purely for educational purposes.
After initiating the backup job we can see some detail towards the end about the data collection which will be analysed for malware.
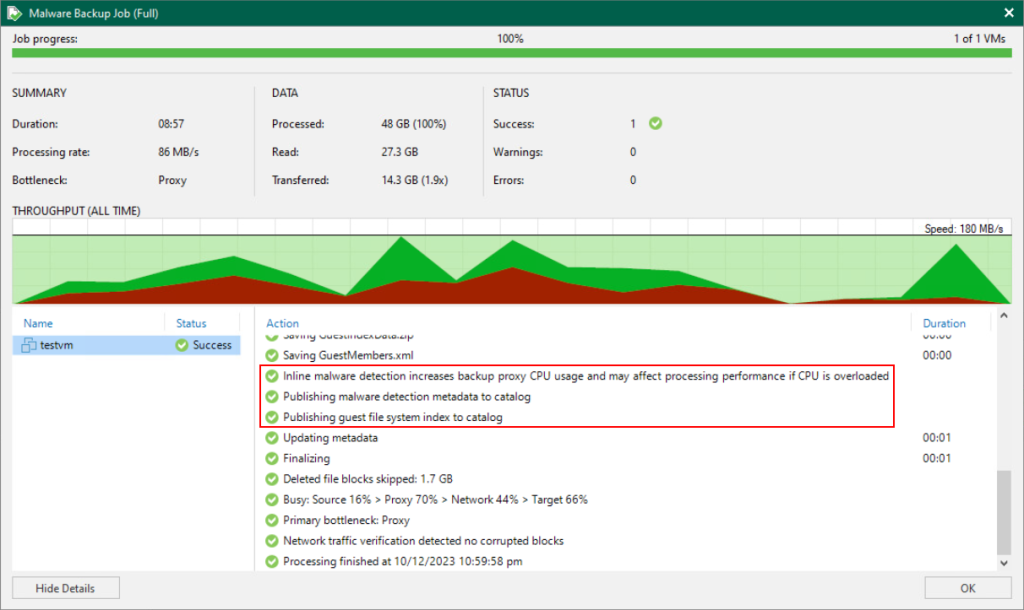
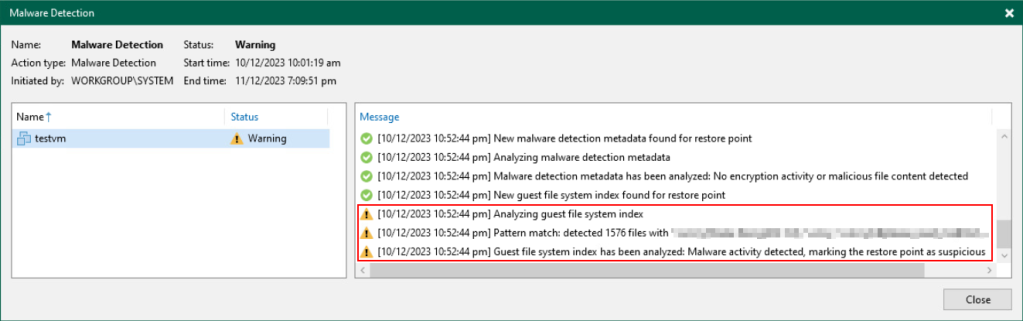
Upon completion of the backup job the Veeam Data Analyzer Service starts looking for malware. This task can be seen in the new Malware Detection section under History:

First the metadata from the encryption detection is analysed followed by the suspicious activity detection which has detected potential malware. The report includes details about the extensions that triggered the detection along with the associated malware type.
The restore point for this VM is now marked as “suspicious” and an email is sent out (if configured) to notify you. An entry for this is also logged under the Malware Events section under History:

Any future restore points that get created will also be marked as suspicious until the machine is marked as “clean” – I’ll cover this part later on.
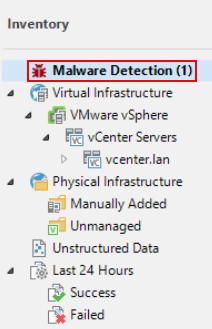
At this point the next step would be to perform a scan. Head over to Inventory then select Malware Detection. Select the machine to be scanned, right click and select Scan backup.

Running a scan will confirm that the restore point actually contains malware and more importantly, find a clean restore point to use should you need to recover. Gone are the days of manually performing restores and scanning for malware over and over. This tool automates the whole process end to end with the added flexibility of selecting a scan mode based on your scenario.

It is possible to scan using either an antivirus engine or a YARA rule. YARA rules are new in 12.1 and are used to classify and identify malware samples by creating descriptions of malware families based on textual or binary patterns. YARA rules allow for a more specific search criteria as they focus on finding a specific malware strain. The process to create YARA rules is documented here.
For demonstration purposes I’ll select Find the last clean restore point for the scan mode and Scan restore points with an antivirus engine for the scan engine which in my case is Windows Defender.

Once the Scan Backup job starts, the machine disks from the most recent restore point are mounted against the mount server and the antivirus begins scanning. This process is repeated for each restore point until a clean one is found. If there are no clean restore points found, the Scan Backup job completes with a failed status and the machine gets marked as “infected”.
In my case, I only have a single restore point for the demo which the scan finds malware threats in and completes with a failed status.

As no clean restore point was found the machine gets marked as infected.

From here there are a few different avenues you could go down to attempt to clean the malware however that is out of the scope of this topic.
Once you are confident the server is 100% malware free you can mark it as clean by heading back to the inventory, opening Malware Detection, right clicking the machine and selecting Mark as clean.

Enter a reason for marking this clean and click Yes to confirm.

The machine gets removed from the Malware Detection list and the event also gets logged under Malware Events in the history:

All in all I think this is a great addition to the product, especially since it is only the first iteration. I’m looking forward to see how it develops in the next few releases. It goes without saying that I don’t wish this situation on anyone but if it does happen, it’s good to know the tools are there should we need them.
Four-Eyes Authorization
This may not be at the top of the feature list for many but it is certainly one of my favourite additions in years. I think we can probably all recall a moment in our career where deleting backup data has resulted in either accidental deletion, a close call or even just second guessing yourself.
The new Four-eyes authorization feature is disabled by default but is something I highly encourage enabling to give you some assurance when performing sensitive operations. Enabling it is as easy as navigating to Users & Roles from the main menu, clicking on the Authorization tab and enabling the checkbox:

Now any time one of the below operations is attempted, approval from another backup administrator is required before the action is executed.
- Deleting backup files or snapshots from the disk or configuration database
- Deleting information about unavailable backups from the configuration database
- Removing backup repositories, storage, and service providers from the backup infrastructure
- Adding, updating and deleting users or user groups
- Enabling and disabling multi-factor authentication (MFA) for all users and user groups
- Resetting MFA for a specific user
- Enabling, updating and disabling automatic logoff for all users and user groups
Let’s test this out by attempting to delete a restore point.
We start by running through the usual process of deleting a restore point with four-eyes authorization enabled.

Rather than being asked to confirm the deletion as we would normally expect, we are instead presented with a message stating that the operation will sit pending until approved by another backup administrator.

After clicking Yes the restore point still remains in the console and a new Pending approvals section appears:

Selecting this shows any approvals for the VBR instance in the pending state including information like the type of operation and the associated VM whose restore points are to be deleted as well as who the request was initiated by. The only option available to the originator of the request is to reject it.

At this point, all users with the Veeam Backup Administrator role will receive an email notification (if configured) containing the details of the request. Backup admins will have 7 days by default (or the number of days that was configured when enabling four-eyes) to process the request after which point it will be automatically rejected.
After logging in as another backup administrator, under the Pending approvals section we have the option to approve or reject the request.

Clicking Approve prompts the user to confirm the action.

Only after clicking Yes does the Backup Deletion Job start to run.

Overall this is exactly how I hoped this feature would be implemented and I looked forward to start rolling it out across 12.1.

Leave a comment