Now that the hardware part of the build is complete you would think at this point the next logical step is to start deploying some workloads. However having worked in the disaster recovery industry for many years, my subconscious defaults straight to backups. I think it is engrained into me by this point.
You might be thinking, why setup backups now when nothing has even been deployed yet? Well, all too often backups are left as the last job on the to do list which can sometimes be days or weeks after workloads are in use. Sometimes it is simply forgotten about all together leaving the data at risk. Moving backup configuration to the top of your list ensures that your data is protected right from the start.
Although my lab will contain test servers which aren’t essential for backup, I do plan to move my more important workloads such as my smart home system into the home lab and it’s essential these are backed up. The market is flooded with backup products to choose from however I will be using Veeam Backup & Replication. It is seen a leader in it’s field and having used it for over 10 years professionally, I know it will serve me well and give me the confidence my data is backed up and available to recover should I need it.
Install
These are the requirements to deploy the current version 11 of Veeam:
https://helpcenter.veeam.com/docs/backup/vsphere/system_requirements.html?ver=110#backup-server: Home lab Build – Part 3: BackupsAlthough Veeam does require a Windows OS, it is legitimately possible use Windows 10/11 without activation if you can live with the limitations:
- Activate Windows watermark
- Activation message at Windows Settings
- No personalization settings
- Frequent notification to activate Windows
None of these will be a problem when running a backup server in my opinion. Once the OS is installed Veeam Backup & Replication can be downloaded after creating a Veeam account:
https://www.veeam.com/virtual-machine-backup-solution-free.html?ad=downloads: Home lab Build – Part 3: BackupsDuring the install of Veeam it will ask to provide a license file. The great thing about using Veeam in a small home lab environment is that you can use the Community Edition which is free and supports backing up 10 workloads. Many of the enterprise features are not available with the Community Edition but for most home users that won’t be an issue.

Configure
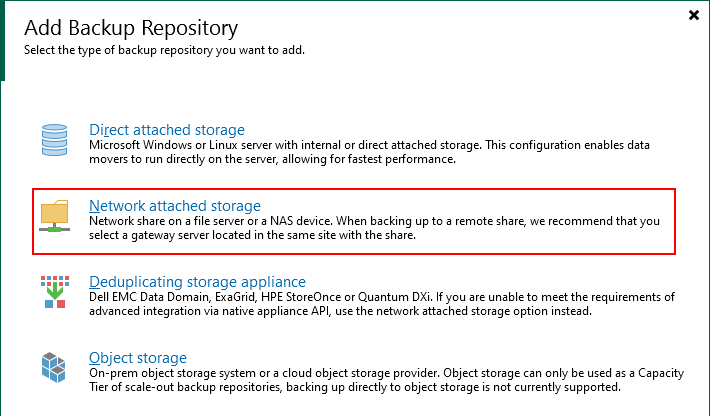
Once Veeam is installed I like to setup the Configuration Backup first so that I have a way to quickly restore the Veeam configuration should anything happen to the server. In order to do this you will need to create a backup repository first by going to Backup Infrastructure > Backup Repositories. Using the default repository is not recommended since the location is on the same Veeam server.
As I have my NAS device, I created a NAS repository using an NFS share.

To successfully connect to the share that I had previously created on the NAS, I had to specifically allow the Veeam server permission to it. For those using Synology that means logging into DSM and creating an NFS rule:


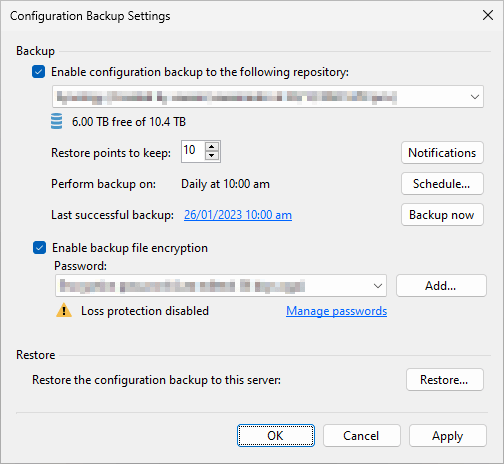
Once the rule has been saved, specify the shared folder name and run through the wizard. Next open the Configuration Backup settings via the top left menu and select the newly created repository and a retention and schedule of your choosing. While it is possible setup configuration backups without encryption enabled at this stage, it is a requirement as soon as a password is stored in the password manager which will occur when creating backup jobs. So I recommend enabling encryption now to ensure the configuration backup continues to run going forward. Just be sure to store the password somewhere safe should you need it.

Backup
Prior to setting up the backup server, I must admit I did provision a vCenter server so that amongst other things, I could make use of tags. This is my preferred way of backing up virtual machines as it doesn’t require any reconfiguration of the backup job once it is setup.
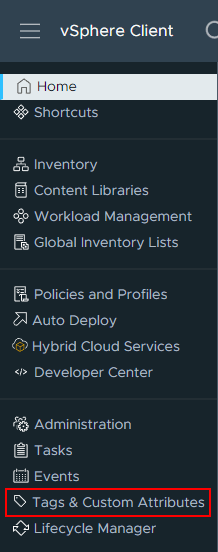
To start off, log into the vCenter server and navigate to the Tags & Custom Attributes section.
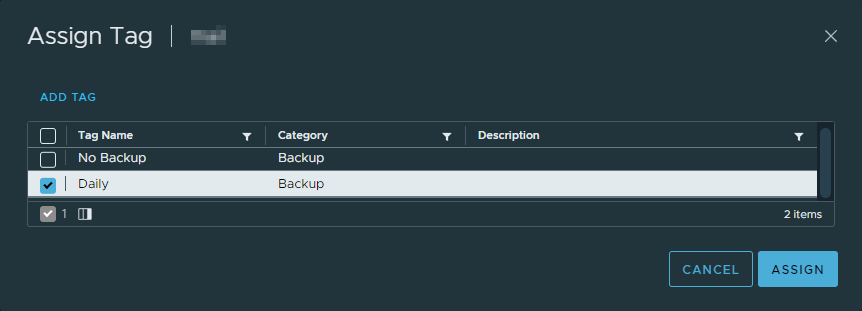
Under Tags > Categories click “New” and make a new category that we will use for defining our backups. I’ve named my category “Backup” but its perfectly acceptable to pick any name that makes sense to you. I’ve also associated the category just with Virtual Machine objects. Then under Tags > Tags click “New” and enter the tag name. It helps if the name is something related to the type of backup like “Daily VM” for example. Feel free to add multiple tags if needed for different backup types.


Then it’s just a case of assigning tags to your VMs.

With tags configured I jumped back into Veeam went through the process of adding the vCenter by going to Backup Infrastructure > Managed Servers and stepping through the wizard.


Next configure the backup under Home then Backup Job > Virtual Machine. At the “Virtual Machines” step click “Add” then click the “VMs and Tags” button. Expand the vCenter and the category and select the tag created earlier.

Stepping through the rest of the backup job wizard under “Storage” I set the backup repository to my NAS and under Advanced > Storage I enabled encryption. Once the job is created, any VM that is assigned the “Daily” tag in this case will be automatically backed up.
Reporting
Just because a server is being backed up, doesn’t necessarily mean its recoverable. Ensuring your backups are completing successfully is just as important. After all, what good are backups if they aren’t running? Setting up reporting is a great way to be informed of any backup issues.
From the top left menu select General Options > E-mail Settings. Configure the SMTP settings for your preferred email provider and use the “Test Message” button to make sure the settings are correct. Set the report schedule to your preferred time – I like to know about any potential issues in the morning. Now select what statuses to be notified on. I would recommend leaving everything selected including “Success”. Although this is likely to fill your mailbox with daily success emails, it gives certainty that the backup ran by the fact an email was received. I get around this problem by having some rules configured which move the successful emails into a “Backups” folder after 1 day.
If you are thinking I don’t need to be notified about when my backups succeed, consider the following scenario. Removing “Success” will result in no email being sent if all backups complete successfully on a given day. Although it is tempting to configure reporting in this way to reduce inbox noise I would not recommend it. Setting it up in this way present the possibility of a scenario where emails are enable to be sent for whatever reason giving the perception that backups are completing successfully. As unlikely as it sounds, I have seen this happen in the past where a client believed backups to be successful however backups had in fact been failing for weeks!

And that’s it for backups. Just remember to assign a tag whenever you create a new VM that needs protecting and it will get backed up providing there is job that targets the assigned tag.

Leave a comment